Back in Sydney, in time for New Year's. I left London on Boxing Day (a cold winter's morning), and after spending about 36 hours in a flying machine, I arrived to a sweltering summer's day. I guess going halfway around the world does have it's rewards sometimes.
The ponies were there to pick me up from the airport. It's pretty much been holiday-time since I've been back. All we've been doing is swimming, waking up late, cycling around the water, watching movies.
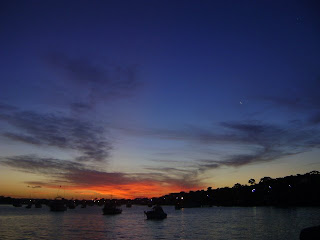
In the three days that I've been back, I've probably cycled more than I have in a year in London. I stacked it on the first night, and I've been a little bit more cautious since. I was going downhill, and couldn't find the slopey bit at the end so ended up just flying over the kerb. Flying's great, it's just the landing that's not so fun. I knew I couldn't do anything to stop it though, so I just tried to enjoy the ride. My hands and knees are a little bit grazed up, but nothing too life threatening. I'm just a lot more cautious on the downhill bits since.
I wish I could tell you about the spectacular items I've been knitting with all my free time, but the truth is, I haven't done anything.
Wednesday, 31 December 2008
Wednesday, 24 December 2008
Candy Colours
After I spent about 2 hours untangling it, I re-dyed it again, finally getting this awesome candy shade.
But now, it's Christmas Eve, and I have guests in the living room waiting for the party to start!
Sunday, 21 December 2008
Berry Ruff
The instructions tell you to purl 5 together, which sounds easy in principle but is actually a bitch to achieve. The stitches insisted on not cooperating with my hands, so in the other, after a bit of yelling and stomping, I discovered another method of purling 5 together. Basically, you slip 2 stitches onto the right needle, then purl 3 together, which is much easier to achieve, then slip the first 2 stitches over the 3 stitches that have already been purled. Much, much easier, and no histrionics involved.
Anyway, for those interested, here are the instructions for bell and berry stitch, as supplied by Patons'.
1st row - k1, *k1, p1, k1, p1, k1 all into the next stitch, p5tog* repeat * to last stitch, k1 on last stitch
2nd row - k1, p to last stitch, k1
3rd row - k1, *p5tog, k1, p1, k1, p1,k1 all into next stitch, repeat * to last stitch, k1
4th row - k1, p to last stitch, k1
5th row - *k1, (yrn) twice, repeat * to last stitch, k1
6th row - *k1, drop next 2 stitches off left needle, repeat * to last stitch, k1
Note: (yrn) stands for 'yarn round needle' which just means to wind your yarn around the right needle, thus creating a new stitch without actually knitting.
Once you get into the hang of things, it's easy enough to follow the pattern and adapt it as you wish.
Basically, to make the ruff, all you need is a set of needles long enough (circular needles work well) and enough yarn in any colour you want. Cast on enough stitches to go around your neck, then knit the first row. In the second row, start increasing by one in every stitch, so that you end up with twice the number of stitches you started out with. Keep increasing in this method and you'll eventually end up with a ruffle. As long as your needles are long enough, you'll be able to make the ruff as big as you want.
If you feel like it, get a nice button and sew it on, so you can button the ruff when you have it on.
I'm starving now, time to feed.
Labels:
bell and berry stitch,
hyperbolic,
ruff,
The Mighty Boosh,
Vince Noir
Thursday, 18 December 2008
Prohibition
This guy we know, Wes, is turning 50 next week, and we got him a suitably apt present to celebrate 50 years of him being a hard-livin', hard-drinkin' rock-n-roll muthafucker.
Ever seen those Westerns/ Prohibition-era movies where the guy opens a book and finds a gun or hip flask in it? Well, that's what we're doing for Wes. Bottle of whisky though, not a gun.
If you've ever wondered how to make a movie-style hollowed-out book, read on for step-by-step instructions:
1) Select a book that's thick enough for your bottle of alcohol/gun. (We used an edition of Miller's Antiques Price Guides
from 2000 - as a joke on Wes' age.)
Have your cutting instrument ready, and measure the size of the bottle you're putting into the book.
2) Leave the first few pages intact so you have something to cover the bottle with, then draw the outline of the bottle on the first page you're cutting on.
Make the sides pretty snug so the bottle doesn't fall out of the book.
3) Start cutting - remember, you've only got several hundred pages to go!
Wednesday, 17 December 2008
Curlypoppet
Despite all my good intentions though, apathy soon set in during breakfast. I blame it all on last night's dinner.
Tasty though. But it did make me want to throw up a little on the way home just so I didn't feel so completely filled up. Throwing up would probably have been an excellent idea though. I'm ashamed to say I couldn't finish my plate of Xinjiang noodles with soup so I had to take the rest of it home. But at least I got to relive the tastiness all over again.
I've been to that restaurant (which I'm pretty sure is just called 'Xinjiang Chinese Restaurant') twice now, and both times, I can't believe how they're just not completely packed out. It's one of the tastiest (and cheapest) places I've found so far, and the food's pretty damnned authentic, except for not being totally covered in a thick layer of grease like in most Central Asian truck-stops. Maybe that's a good thing - it means I'll always be guranteed a spot straightaway without having to wait or share a table.
Sorry about the lack of knitting postage today. I'm just too apathetic. I'm just going to lie down in my pink leopard-print dressing gown now...
Tuesday, 16 December 2008
Time Lords and Berries
Watch out for a newie coming soon, done up in a bell and berry stitch.
I know I said scarves bore me in my last posting, but I've secretly been working on a long stripey scarf based on Tom Baker's scarf during his incarnation as the Time Lord.
It's done in an idiot proof garter stitch and means I can knit it without looking at it while watching old episodes of...Dr. Who. It's progressed a fair amount in a couple of hours.
And in my defence, the scarf will end up a present for a massive Dr. Who fanboy.
It's done in an idiot proof garter stitch and means I can knit it without looking at it while watching old episodes of...Dr. Who. It's progressed a fair amount in a couple of hours.
And in my defence, the scarf will end up a present for a massive Dr. Who fanboy.
Labels:
bell and berry stitch,
Dr. Who,
garter stitch,
Tom Baker
Monday, 15 December 2008
Geek!
The Moebius scarf finally came off my needles last night. I started it months ago, using yarn scraps, knitting it during the spare times at work (guess it's lucky that I had a lot of spare time when I was supposed to be working).
Seeing as it was my last day at the hostel yesterday, I thought it fitting that the scarf should be finished around the same time too. A stripey, woolly reminder of those many, many dead hours spent waiting for smelly touros to check-in. So I did a couple more rows then cast off just before bedtime.
The Moebius scarf is, of course, based on the Moebius strip (named after August Ferdinand Moebius). A simple model can be made by giving a strip of paper a half-twist, then taping the ends together. The simplest way to make a Moebius scarf would therefore be to knit a straight scarf, then giving the scarf a half-twist before knitting the ends together. Voila! Moebius scarf!
But I get bored easily when knitting scarves, so I looked for other methods. I wanted to knit using circular needles, and found these instructions for knitting a Moebius scarf in the round.
It actually took me a couple of tries to get the first few steps right, but then, I'm not the best at following instructions. Finally got it though, and it's just like normal circular knitting. Except with twisted needles.The Moebius scarf is, of course, based on the Moebius strip (named after August Ferdinand Moebius). A simple model can be made by giving a strip of paper a half-twist, then taping the ends together. The simplest way to make a Moebius scarf would therefore be to knit a straight scarf, then giving the scarf a half-twist before knitting the ends together. Voila! Moebius scarf!
But I get bored easily when knitting scarves, so I looked for other methods. I wanted to knit using circular needles, and found these instructions for knitting a Moebius scarf in the round.
Subscribe to:
Posts (Atom)