Showing posts with label dress. Show all posts

Friday, 28 November 2014

The Lil(le) Black Dress

Now that winter is well and truly on it's way, why not do a post about a really hot summery daytrip in July, eh? The occasion was The Manbacon's 35th birthday, and I'd spent the previous two weeks frantically arranging tickets to Lille, and making sure that he'd booked that day off, while keeping the trip a surprise from him. I also managed to make myself a little black dress for the trip, in between everything else. 
It's difficult to make out many details on this dress, but it's made with black jersey (from the op-shop, of course), to a bodice pattern by Sew Vera Venus. The pattern itself is only available in one size, for busts between 35 to 37 inches, and is meant for woven fabrics. Since I usually wear a 34" bust, I simply 'cheated' and made the seam allowances slightly larger, instead of faffing about with grading it down. I figured that since my fabric had quite a bit of stretch to it, it wouldn't really matter too much if I accidentally took too much in.  

Once the bodice came together, it took no time at all to make a skirt from the rest of the fabric (simply two rectangles joined at the side seams) and attach it to the top. I also cut a long strip of fabric and sewed it into a tube, to make the spaghetti straps for my dress. Probably not the best idea to use a flimsy strip of stretchy jersey to hold up your dress - I spent many minutes throughout the day tugging at the bodice and tying and retying the straps and as they had a tendency to stretch and head south as the day progressed. 

Other than that little problem (which seems to have finally sorted itself out - the straps seem to have stopped stretching), the dress itself was a dream to wear, especially on a filthy hot, humid summer day. I've since worn that dress several times, putting it to the test by cycling and even getting tangled in blackberry bushes while wearing it, and it's held up wonderfully. 
As I mentioned above, it was a pretty disgustingly sweaty type of day, so we passed the worst of it in the seemingly under-hyped treasure that is the Lille Natural History Museum (Musee d'Histoire Naturelle). There was almost no one else there except for us and the staff, so we explored the collections in peace. There's plenty of wonderful taxidermy animals in it, including the rather magnificent Ron Swanson-like snow leopard above, as well as a little tableau showing how they mount the animals for display. 

The twitchers among you might also be interested to know that the museum has a vast collection of stuffed birds, all displayed in beautiful old vitrines, including hundreds of jewel-toned hummingbirds. These were breathtaking, I spent ages staring at them trying to memorise every single detail. There are a few displays of dinosaur fossils, although nowhere near as spectacular as the displays at the Royal Belgian Institute of Natural Sciences. And, almost forgotten in a hidden corner upstairs, is a rather lonely little axolotl. It's quite a small musuem, but it's got such a still, old-fashioned air about it that it's easy to lose hours in there enjoying the various exhibits. 
Dress - self made, pattern from Sew Vera Venus, handbag - vintage, belt - Sainsburys, sunglasses - vintage

19, rue de Bruxelles
59000 Lille
France

Thursday, 7 August 2014

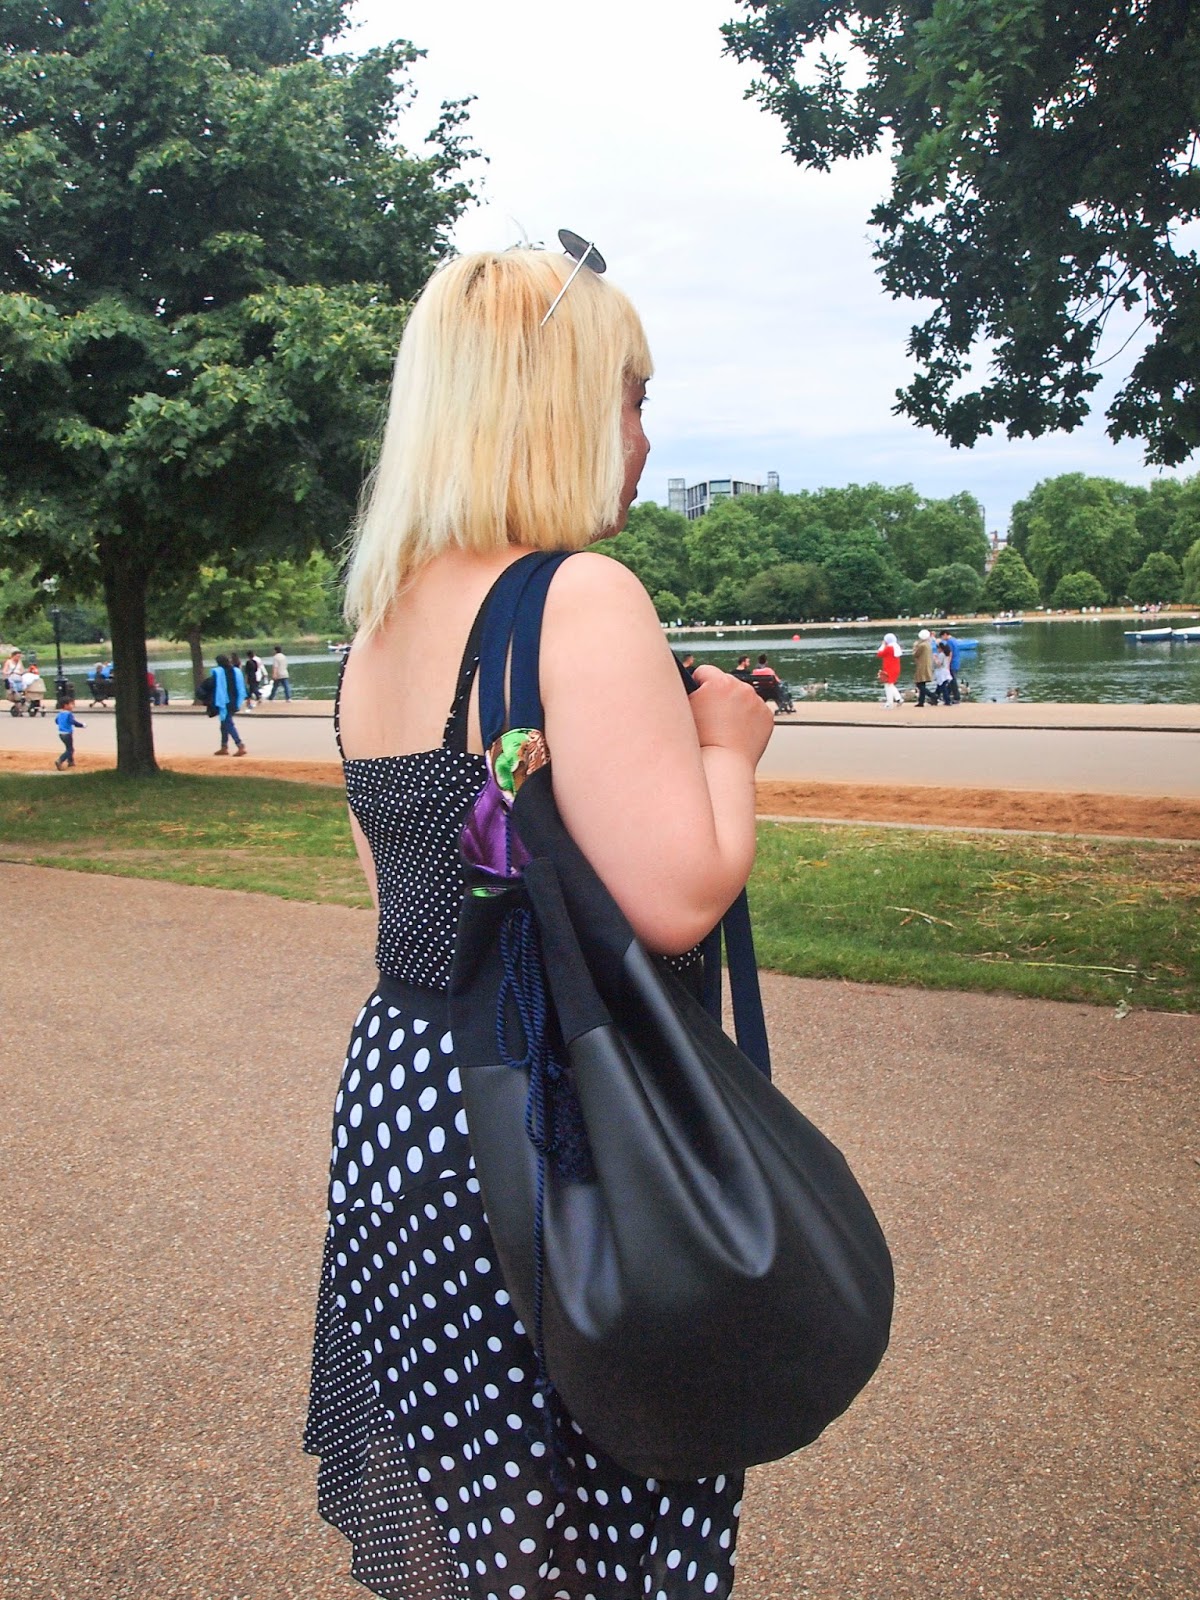
Two-tone Bucket Bag

The temptation to sew my own bags hit me hard about a year ago, but I tried to resist, until, one fateful night about six months ago, what should I find on ebay but a copy of McCall's 9261. It included about 7 patterns, mostly for simple tote bags, but what really caught my eye was the military-style bucket bag on the cover. All that for only 60p, because the seller's dog had taken it for a chew toy. Two clicks and it was mine! 

I wanted a hard-wearing bag that wouldn't clash too most of my clothes, so I dug out a piece of black faux leather that a friend had given me a while ago. The leather was just long enough, but alas, not wide enough for the bag. What to do? A quick dig through my stash and I found a leg from some old black jeans - it turned out to be wide enough to make up the missing height, and made a nice textural contrast against the black leather. 
The pattern itself is fairly simple - two large rectangles for the bag and lining, and two circles for the base of the bag and the lining. There's also one smaller rectangle for the pocket, which I placed inside, on the lining fabric, instead of front and centre as in the illustration. The other change I made was to add two straps, so I could wear the bag on both shoulders (more comfy this way!), instead of one strap across the body. I cut the straps out of some lovely dark blue suede that was purchased from an op-shop last year. 

The lining fabric - which you can see peeking out in some photos - is a very polyester-y, 1960/70s upholstery fabric that I got for free (FREE!) when a friend of a friend was destashing and moving to faraway lands. It was a nice loud floral, very emblematic of it's era, but I had qualms about using it in something wearable, because, urgh, so plasticky. It made a nice contrast to all the black and blue on the outside and was a nice, heavy weight. The pattern also suggested interfacing the fabric, but I skipped it because the denim was thick enough, and also, laziness. 

It all came together fairly quickly, mostly straight lines except for having to sew the round base to the tube of fabric to form a bag, but even that was pretty straightforward once I neatened up the edges of the circles. The machine did groan a little when going through double or triple thicknesses of denim and leather, but I just told it to shut up, used a leather needle and sewed very slowly. I also topstitched everything, in an attempt at a professional, finished look. 

The longest, and perhaps most annoying bits, were having to insert the grommets into the top of the bag for the drawstring closure. The grommets required were pretty big, about 15mm wide, and I had to be very careful and make sure I didn't tear the fabric too much so they popped out and left a big hole in the bag. Which, when all you want is to go the park with your new bag, is very frustrating. I used a awl (the sharp point thing, not an owl, the bird) to make the initial hole, then widened it slowly with a variety of sharp implements, carefully pushing the threads aside instead of cutting through them. Then, when it was wide enough, I had to hammer the grommet in, making sure no sharp metal bits stuck out. The first one took me about half an hour to insert, I kid you not. I think I managed to get it down to about 7 minutes per grommet towards the end, but dammnit, that was a long afternoon. 
Sunglasses - Shotgun Wedding at The Tea Rooms, Brick Lane
Dress - from Hong Kong (about 15 years old)
Bag - Self-made
Boots - H&M (about 3 years old)

Friday, 4 October 2013

The Garden Party Dress

The warm, golden sunlight in these pictures will probably alert you to the fact that these pictures were taken months ago. Oh well, best get blogging about this dress before winter finally gets here!

The impetus for this dress came about when an acquaintance handed me the invite to her wedding. Dress code - 'formal'...which always brings to my mind some sort of Disney princess dress (like this) - you know, floofy skirt, lots of sequins and tulle, the works. The type of dress that I would wear to a Manowar show, but felt a bit uncomfortable wearing to a mid-summer, outdoor wedding reception. Thus began the hunt for a 'grown-up' dress pattern. 
A quick online search lead me to Butterick B5281, a reissue of a 1946 pattern. Those illustrated babes looked so elegant and sassy, so a few clicks later and I was on my way to replicating that sassy elegance. Unfortunately, elegance is a foreign country to me, as evidenced by the above photo of me hanging on to 2 wine glasses. Oh well, I'll go for sassy then.

On to the technical bits. For the bodice, I decided to trace a size 10 at the bust, graduating up to a size 12 at the waist seam and skirt. The other change I made to it was to hack about 5 inches off the skirt, because I have short stumpy legs. Since it was rather more complicated than my usual patterns, I decided to make a toile first, in the same fabric that would later be used for the lining (a pink polycotton sheet for the bodice, and a navy blue acetate for the skirt, both from the opshop). The dress fabric was two metres of slightly sheer ikat-looking fabric that I purchased last year at the Wimbledon car boot sale. It's most likely a wool/polyester mix - it has no label, but I have a skirt that feels exactly the same, and is about 70% wool/30% polyester.

Constructing the dress was suprisingly easy, although the shoulder-flap bit on the left threw me a little.The trickiest part was probably inserting the side zipper - my first! I took my time and yelled a few unnecessary words, but managed to fit it in without too many wrinkles. It's a lapped zipper, which I thought fitted the whole vintage pattern thing a lot better than an invisible zipper.

Although it wasn't too difficult to sew up, it did take a lot of time though...so much so that I was sat at my machine at 10.30pm the night before the wedding, trying to finish fit the lining in. I cheated in the end, and set in the sleeve lining with big rough basting stitches. The skirt was roughly turned up and sewed with big machine basting stitches. No-one else could see it, and I've since managed to clean it all up. 

Dress - selfmade, necklace - vintage, brooch - vintage, tights - Sainsburys, shoes - from Hong Kong

Friday, 24 May 2013

Black Poppy - Refashioned Floral Dress

The original dress (plus some wrinkles)

This dress, like so many of my other refashioned items, was found in an op-shop (for the bargain price of £2.99! I love Salvos!), and originally from Marks and Spencers. I loved the print and drapey fabric, and the bodice evoked 1940s dresses with its double-breasted opening. Unfortunately, it was a size 16, and way too long for me - the skirt went down to my ankles. The shoulders were also much too big, and padded as well, for full 1980s effect.
Out came my trusty seam ripper, and off went the sleeves and skirt. There was some elastic along the waist, so I gently unpicked that too, and saved it, just in case. I started by adding some bust and waist darts, and then took in an inch along each side seam, to bring in the bodice and make it a closer fit. The shoulders were still too big, so I cut off an inch at the top (narrowing it down to nothing at the bottom of the armscye). This of course meant the sleeves were a little too big when I tried to set them in, so instead of gathering and easing it in, I added two little pleats to the top of the sleeves. You can see how that turned out in the photo above - I'm quite pleased with it, although of course it means I have to iron them down after every wash.
After that, everything else got done fairly quickly and smoothly. I gathered the skirt and attached it back to the bodice, then reattached the elastic that I had unpicked from the dress earlier. The belt was still much too big though, so I added a couple more holes with the help of my trusty eyelet kit. I found mine in an op-shop, but you can find a similar kit here - trust me, it's more useful than you think it will be. 

The only thing left was to shorten the skirt. I briefly considered leaving it long, as I'm partial to a good mid-length skirt, but this just looked a little too mumsy for my taste. So I ended up taking a good EIGHT inches off, which left it at a nice just-above-the-knee length. Job done, and it's quickly become one of the dresses I reach for whenever I want to feel just a little bit (not too much) dressed up.

Wednesday, 7 November 2012

Recent Refashions

Alright, let's move on from those rather hideous Halloween photos onto something more pleasant, shall we? I think it's been a while since I've done a sewing-related post. It's not that I haven't done any sewing, it's just that most of the finished products have been for work, which mean the pieces usually come straight off the sewing machine and into the stall, with time only for a couple of quick snaps. 

First up, this khaki blouse. I forgot to do a 'before' shot, but it was just a standard fitted men's shirt originally from Joseph Conran (but which I probably purchased in an op-shop). As you can see, I cut the back off at waist height, then cut and sewed the front at an angle. The front of the shirt ended in points at the middle, so the middle can be tied up once the last two buttons are undone. I also unpicked the sleeves, cut it off about halfway down, then gathered and sewed the sleeves back to the top halves of the armscyes. 
I bought the next shirt because I couldn't tear my eyes away from that crazy pattern. It's a huge men's shirt, made with wool. There were some tears and holes just above the bottom hem of the shirt, so that had to be cut off. The collar went as well. 
 
I also unpicked the sleeves, and tried a similar trick to the khaki shirt above, except I cut them slightly shorter this time. To make the shirt narrower, I sewed some darts to the front and back of the bodice. The shirt was still much too wide, so I decided to add some elastic around the waist. I swear the elastic has been sewn on straight in real-life, even though it looks crazy cooked in the photo below. I also shirred the shoulders a little so they weren't droopy-looking. Lastly, some remnants were used to make a removable bow, which you can just barely see in the picture below, pinned to the top of the button placket. 
Finally, this rather florid men's shirt, foisted onto me by a very persistent friend who clearly didn't understand the phrase 'no-i-don't-want-it-take-it-away'. Faced with yet another oversized men's shirt, I decided to do what I usually do with them, and cut it up.
 
The shirt was made of a very soft viscose, and looked much livelier once it was given a wash and iron. I removed the sleeves, and finished off the edges with some bias binding folder under. The top collar was next to go, while the collar stand was left on for a Mandarin collar look. I then cut a two strips of fabric from the unpicked sleeves, and attached them to the sides to form a couple of ties. The refashion was nearly complete, but I felt it needed something more. MOAR! It was then I remembered some soft vintage lace I had in my stash. I cut off a long length of it (about twice as long as the hem of the shirt) and gathered it to the bottom hem, which resulted in a new, asymmetric hemline. The lace also helped add some much needed length to the shirt, transforming it from tunic-length to proper dress-length. 
I've just finished a few more refashions, which will be featured in another upcoming post. Stay tuned!

Wednesday, 31 October 2012

Happy Halloween!

BOO!

Friday, 10 August 2012

Park Life - Refashioned Dress

Nope, not auditioning for Singing In The Rain, in case you were wondering why I happen to be posing with a umbrella. These photos were shot on a afternoon when the sky went from frowny nacreous grey to a honey golden light - the kind that Tumblr dreams are made of - all in the space of the less-than-five-minutes it takes to walk to the local park. 
Anyway, back to this dress - another op-shop find which I rather uncharacteristically resisted buying right away, only to keep thinking about it and go back for it two days later. Of course, it was still on the same rack. What, no one else finds a sack-like, shoulderpadded 1980s muumuu desirable? You fools!

It's awesome pointed collar and lovely, soft fabric with that sort of 1950s print was what convinced me. I took it home, and decided to chop off the sleeves, unpad the shoulders, and remove some of the length. That made it a lot better, but it was still too wide. I looked like a green square. I got some elastic, and sewed it to each side of the waist seam, which brought it all in and made the dress a lot more fitted. 
Verdict? This dress is so comfortable that I've already worn it three times in the first week. It's now in the laundry suitcase waiting for a wash, and then it'll be worn again and again and again and again and again...I sure, it's like wearing pyjamas in public, except I don't look disapprovingly at my reflection and raise the corner of my upper lip. The picture below shows you exactly how smug I feel when I wear pyjama-comfy clothes in public - it's practically cheating!
Black felt hat - vintage, antique umbrella - available at the Bobbie and Lola stall, faux leather jacket - Primark, dress - refashioned, tights - Sainsburys, purple suede brogues - Marks and Spencers

Friday, 3 August 2012

Little Old Lady

Hello dearie, look who I met at the boot fair on Wednesday!
My two most favourite parts - her raised finger and braided bun. 
Granny Armitage (from the little label sewn onto her petticoat) was made with such care and attention. Her clothes were made with the most perfect little hand stitches, and her little plaster face has been painted with so much expression. Could she be a close relative of Granny Weatherwax?