Tuesday, 9 December 2014

Black Circle Skirt

Hey look, another black jersey item...how exciting! 

Yes fine, it's not the most challenging make, but I'd argue that a good circle skirt is a pretty essential part of a wardrobe. Especially when that wardrobe has to fit into a rucksack and spend the next two weeks travelling by rail and bus through Poland, Germany and France. 

It was for that very reason that I chose this black, textured double-knit jersey from my gigantic eBay haul of a couple of years ago. The fabric's weight gave the skirt a nice drape, while the all-over crinkly texture helped disguise most packing wrinkles. I was able to shake it out of the bag and put it on without fussing with an iron. Best of all, it helped me look and feel slightly more elegant - even when I was just wearing a t-shirt - then the pair of shorts and crumpled trousers I'd brought along. 
The lovely team at By Hand London brought out a circle skirt app several months ago - if you haven't tried it yet, what the hell are you waiting for? It's helped simplify things so much, and was what I used to make this skirt. I've used it before to make another circle skirt - a navy and white striped piece that has yet to be blogged. And now I keep wanting to make more skirts! I'm currently restraining myself from making 20 different circle skirts, but it's hard to do when the app makes it so easy and the results are so comfortable. 

There's not much else to say about this skirt really - other than I really LOVE IT and have worn it A LOT. So much, in fact, that I have to make a conscious effort not to wear it every week so the people I work with don't think I only have one set of clothes. I really should make one or two more circle skirts in other fabrics to change things up a bit. 

What else? It's got a lapped zipper, and a waistband made of the same fabric, which unfortunately stretched a bit but is really useful for when I've eaten too much. Oh, it's also got big, deep pockets, lined in big pink fabric. For keeping my hands in, either on cold days or when I'm feeling awkward and have no idea what to do with them.
 Sunglasses - Shotgun Wedding at the Tea Rooms, T-shirt - op-shop, Skirt - self-made, Bag - op-shop, plimsolls - John Lewis

Friday, 28 November 2014

The Lil(le) Black Dress

Now that winter is well and truly on it's way, why not do a post about a really hot summery daytrip in July, eh? The occasion was The Manbacon's 35th birthday, and I'd spent the previous two weeks frantically arranging tickets to Lille, and making sure that he'd booked that day off, while keeping the trip a surprise from him. I also managed to make myself a little black dress for the trip, in between everything else. 
It's difficult to make out many details on this dress, but it's made with black jersey (from the op-shop, of course), to a bodice pattern by Sew Vera Venus. The pattern itself is only available in one size, for busts between 35 to 37 inches, and is meant for woven fabrics. Since I usually wear a 34" bust, I simply 'cheated' and made the seam allowances slightly larger, instead of faffing about with grading it down. I figured that since my fabric had quite a bit of stretch to it, it wouldn't really matter too much if I accidentally took too much in.  

Once the bodice came together, it took no time at all to make a skirt from the rest of the fabric (simply two rectangles joined at the side seams) and attach it to the top. I also cut a long strip of fabric and sewed it into a tube, to make the spaghetti straps for my dress. Probably not the best idea to use a flimsy strip of stretchy jersey to hold up your dress - I spent many minutes throughout the day tugging at the bodice and tying and retying the straps and as they had a tendency to stretch and head south as the day progressed. 

Other than that little problem (which seems to have finally sorted itself out - the straps seem to have stopped stretching), the dress itself was a dream to wear, especially on a filthy hot, humid summer day. I've since worn that dress several times, putting it to the test by cycling and even getting tangled in blackberry bushes while wearing it, and it's held up wonderfully. 
As I mentioned above, it was a pretty disgustingly sweaty type of day, so we passed the worst of it in the seemingly under-hyped treasure that is the Lille Natural History Museum (Musee d'Histoire Naturelle). There was almost no one else there except for us and the staff, so we explored the collections in peace. There's plenty of wonderful taxidermy animals in it, including the rather magnificent Ron Swanson-like snow leopard above, as well as a little tableau showing how they mount the animals for display. 

The twitchers among you might also be interested to know that the museum has a vast collection of stuffed birds, all displayed in beautiful old vitrines, including hundreds of jewel-toned hummingbirds. These were breathtaking, I spent ages staring at them trying to memorise every single detail. There are a few displays of dinosaur fossils, although nowhere near as spectacular as the displays at the Royal Belgian Institute of Natural Sciences. And, almost forgotten in a hidden corner upstairs, is a rather lonely little axolotl. It's quite a small musuem, but it's got such a still, old-fashioned air about it that it's easy to lose hours in there enjoying the various exhibits. 
Dress - self made, pattern from Sew Vera Venus, handbag - vintage, belt - Sainsburys, sunglasses - vintage

19, rue de Bruxelles
59000 Lille
France

Tuesday, 2 September 2014

The Red House

Well, this post is a little late. Okay, more than a little - I went to the Red House last August Bank Holiday, so a whole year ago, in fact.  Located a short walk away from Bexleyheath train station, it was built and lived in by William Morris and his family, and was a gathering place for a host of Pre-Raphaelite artists. It is currently managed by the National Trust, and features a wealth of paintings, furniture and artworks created by Morris and his contemporaries, especially Edward Burne-Jones. 

We chose to explore the house without a guide, and so could spend as long as we wanted admiring the various nooks and crannies of the place. The house is surrounded by a rather large garden, which, despite being nearly the end of summer, was still in bloom, full of lazy dahlias and fragrant herbs. We packed a small lunch, and spent some time on a bench in front of the main house, just taking it all in. Anyway, less talk, more photos... 
   

Red House Lane, Bexleyheath
DA6 8JF

Thursday, 7 August 2014

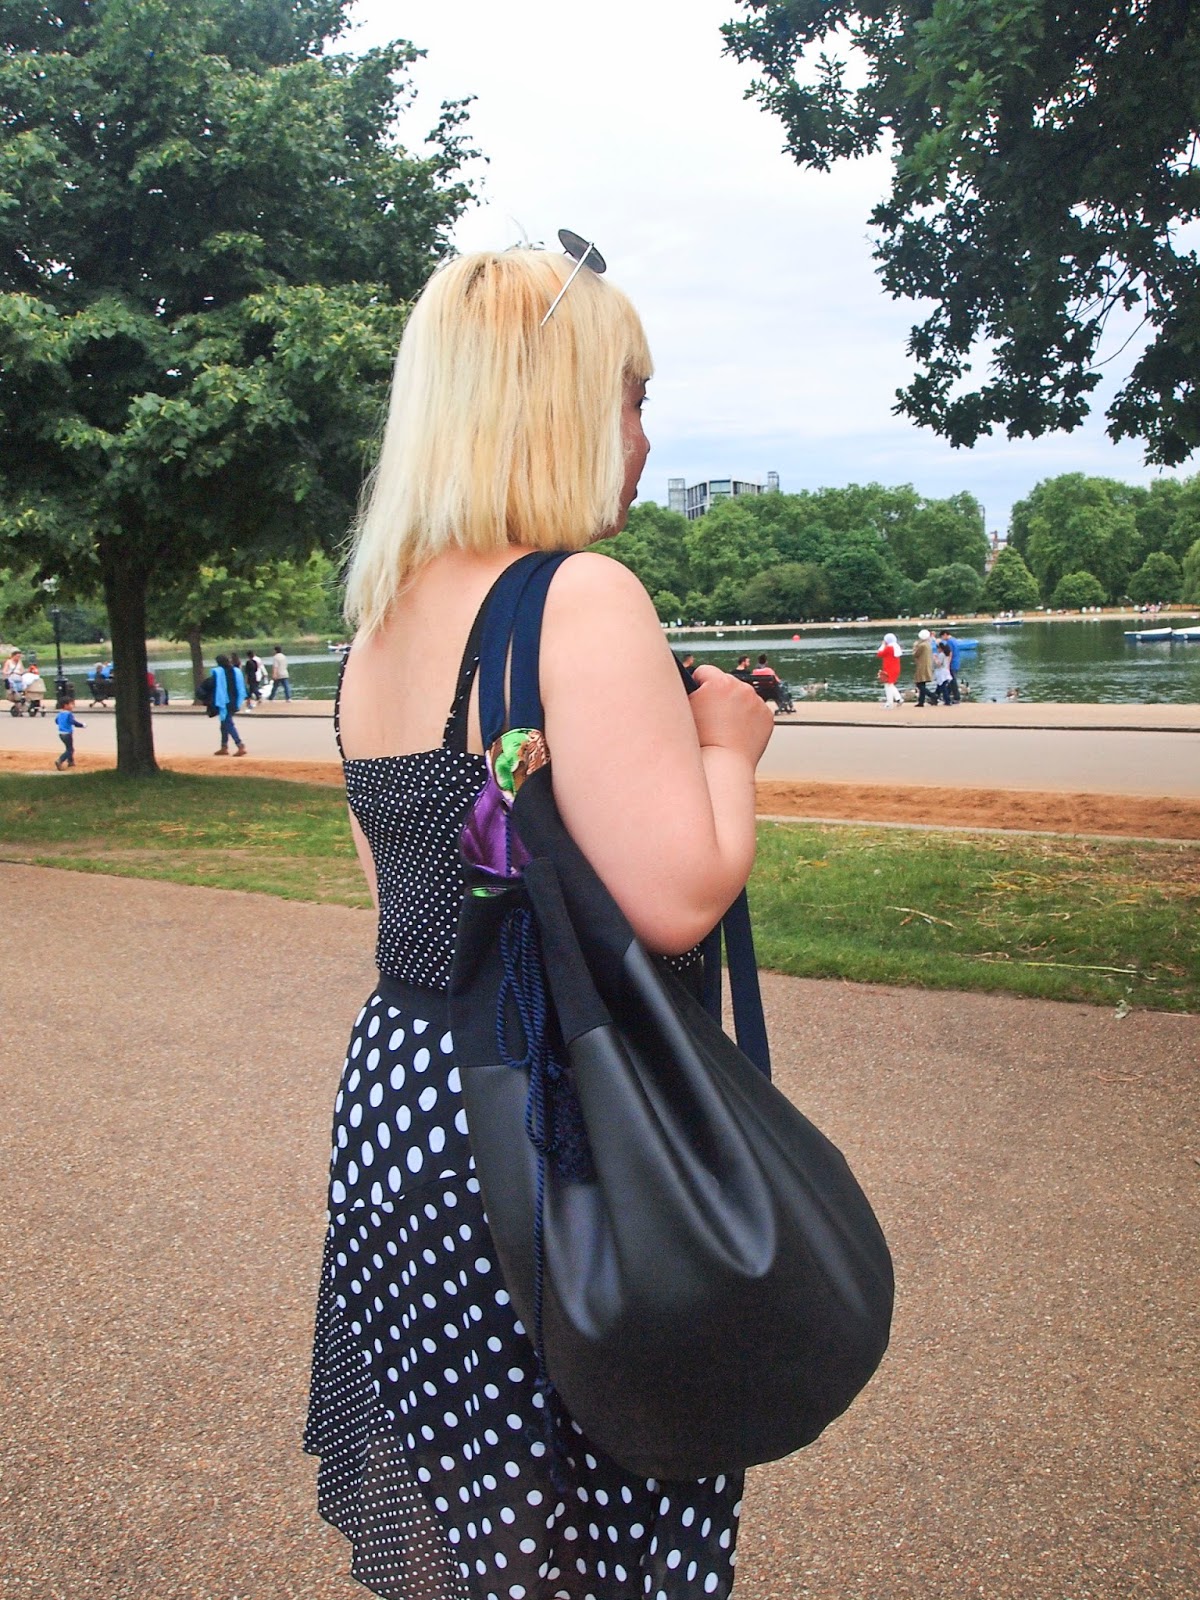
Two-tone Bucket Bag

The temptation to sew my own bags hit me hard about a year ago, but I tried to resist, until, one fateful night about six months ago, what should I find on ebay but a copy of McCall's 9261. It included about 7 patterns, mostly for simple tote bags, but what really caught my eye was the military-style bucket bag on the cover. All that for only 60p, because the seller's dog had taken it for a chew toy. Two clicks and it was mine! 

I wanted a hard-wearing bag that wouldn't clash too most of my clothes, so I dug out a piece of black faux leather that a friend had given me a while ago. The leather was just long enough, but alas, not wide enough for the bag. What to do? A quick dig through my stash and I found a leg from some old black jeans - it turned out to be wide enough to make up the missing height, and made a nice textural contrast against the black leather. 
The pattern itself is fairly simple - two large rectangles for the bag and lining, and two circles for the base of the bag and the lining. There's also one smaller rectangle for the pocket, which I placed inside, on the lining fabric, instead of front and centre as in the illustration. The other change I made was to add two straps, so I could wear the bag on both shoulders (more comfy this way!), instead of one strap across the body. I cut the straps out of some lovely dark blue suede that was purchased from an op-shop last year. 

The lining fabric - which you can see peeking out in some photos - is a very polyester-y, 1960/70s upholstery fabric that I got for free (FREE!) when a friend of a friend was destashing and moving to faraway lands. It was a nice loud floral, very emblematic of it's era, but I had qualms about using it in something wearable, because, urgh, so plasticky. It made a nice contrast to all the black and blue on the outside and was a nice, heavy weight. The pattern also suggested interfacing the fabric, but I skipped it because the denim was thick enough, and also, laziness. 

It all came together fairly quickly, mostly straight lines except for having to sew the round base to the tube of fabric to form a bag, but even that was pretty straightforward once I neatened up the edges of the circles. The machine did groan a little when going through double or triple thicknesses of denim and leather, but I just told it to shut up, used a leather needle and sewed very slowly. I also topstitched everything, in an attempt at a professional, finished look. 

The longest, and perhaps most annoying bits, were having to insert the grommets into the top of the bag for the drawstring closure. The grommets required were pretty big, about 15mm wide, and I had to be very careful and make sure I didn't tear the fabric too much so they popped out and left a big hole in the bag. Which, when all you want is to go the park with your new bag, is very frustrating. I used a awl (the sharp point thing, not an owl, the bird) to make the initial hole, then widened it slowly with a variety of sharp implements, carefully pushing the threads aside instead of cutting through them. Then, when it was wide enough, I had to hammer the grommet in, making sure no sharp metal bits stuck out. The first one took me about half an hour to insert, I kid you not. I think I managed to get it down to about 7 minutes per grommet towards the end, but dammnit, that was a long afternoon. 
Sunglasses - Shotgun Wedding at The Tea Rooms, Brick Lane
Dress - from Hong Kong (about 15 years old)
Bag - Self-made
Boots - H&M (about 3 years old)

Wednesday, 23 July 2014

None More Black Bustier Top

Hello, remember me? I fell off the blogging map for a bit. My excuse? The computer imploded, and despite being married to an IT genius, I had to survive on an ancient Mac laptop that was basically help together with several reels of sticky tape for the next few months. My hands have been far from idle during this period - this bustier is one of a number of items I've sewn up but haven't had time to blog about yet. 

I intended this to be a wearable toile, before cutting into my fancy fabrics. The material came from two old skirts - a corduroy one that had seen better days, and a velvet skirt that had already been partly incorporated into a pencil skirt. It was also lined with some scraps of double-knit jersey from my stash, to prevent any potential chafing situations. 

The bustier was based on Burdastyle 01/2012 #127 - it comes with a pattern for highwaisted pants which I will attempt sometime soon (in Spandex perhaps?). It's a relatively simple pattern, with three pattern pieces - centre front, sides and back. I also added some thick straps to it, which were traced from New Look 6675. The straps help prevent any embarrassing clothing malfunctions, and also stop me from having to hoik up the bustier every 10 seconds or so. The bustier was lengthened by about 1.5 inches, by attaching the waistband of the corduroy skirt to the bottom of the bustier. I felt that this gave it a more finished look, turning it from lingerie-style top to a proper 'outside' top.

I made it in a size 34 bust, and used the size 8 for the straps. Unfortunately, my shoulder-to-boob ratio (proper technical term) is slightly shorter than the long lithe creatures they usually design for, so the straps were just ever slightly too long. Which I only found out after wearing the top around town for a day, constantly fiddling and pulling them back up onto my shoulders. So I ended up unpicking about half the machine-sewn stitches and cutting about 1cm off the straps. The top fits so much better now but let me tell you, I could have stabbed someone with a seam-ripper when I had to do that correction.

The double-layer of thick fabric was perfect for April, which was when the bustier was finished and when these photos were taken. It was perfect over a high-waisted skirt or trousers, and under a light jacket or cardigan. However, the temperature has risen considerably since than, which means that I end up with a rather unglamourous line of sweat between my boobs. It's a very comfortable top for these warmer temperatures though, so I will be working on one of two more versions in the near future, made with much thinner fabric. 
Sunglasses - vintage (op-shop)
Necklace - op-shop
Denim jacket - Levi's (bought new about 15 years ago)
Bustier top - self-made
Belt - Sainsburys 
1970s skirt - op-shop

Friday, 25 April 2014

Icarus

Hand-cut collage, approx. 4" x 6"

Thursday, 24 April 2014

Hercules

Hand-cut collage on card, approx 4" x 6". 

Monday, 14 April 2014

Mocha Choca Madeleines

Having chanced upon some madeleine tins while in Calais in November last year, I returned to London with all the best intentions of churning out try after tray of the tiny delicacies. I would be making madeleines every weekend, my kitchen would be filled with edible seashell shapes in all colours of the rainbow, all with different flavours. Best-laid schemes of mice and (wo)men, and all that...and so the tins languished in my kitchen cupboard for the next few months. 

Anyway, Ari sent me a link to that John Whaite off the GBBO's* recipe for madeleines flavoured with chocolate and coffee. They sounded tasty, and not too complicated. So I gave them a go. He also includes a recipe for a cocoa-flavoured dipping sauce, but I left that out and simply dusted with icing sugar instead.

*That's Great British Bake-Off for those of you not au fait with today's yoof slang. 
Mocha Choca Madeleines (adapted from John Whaite's recipe for the Telegraph)

Ingredients
100g salted butter
2 eggs
100g caster sugar
1 tsp coffee extract (I used this)
85gms plain flour
15g cocoa powder

Directions
- Preheat the oven to 190 degrees C.

- Melt the butter in a saucepan over a medium heat, then set aside.

- Put the eggs, sugar and coffee extract into a mixing bowl, and beat with an electric whisk until light and fluffy, and tripled in volume. This should take about 12 -15 mins.

- Sift the flour and cocoa powder into the egg mixture, then pour in the butter. Gently fold these into the egg mixture until smooth and silky.

- Fill the madeleine moulds about 2/3 full, then bake for 8 - 10 mins or until the madeleines look slightly browned around the ages. Turn them out of the tin as soon as they are baked or they will stick. Lightly dust with icing sugar or cocoa powder (optional). 

Tuesday, 8 April 2014

First Aid

If you find yourself with a cut, a scrape, a bruise, or a wound of any sort...please do not seek me out. My stall at the Tea Rooms may have a rather impressive collection of First Aid kits, bandages, and various lotions and potions, but they're all rather, erm, old. Strictly for display, or to frighten off some squeamish friends.