Showing posts with label sewing machine. Show all posts

Friday, 28 November 2014

The Lil(le) Black Dress

Now that winter is well and truly on it's way, why not do a post about a really hot summery daytrip in July, eh? The occasion was The Manbacon's 35th birthday, and I'd spent the previous two weeks frantically arranging tickets to Lille, and making sure that he'd booked that day off, while keeping the trip a surprise from him. I also managed to make myself a little black dress for the trip, in between everything else. 
It's difficult to make out many details on this dress, but it's made with black jersey (from the op-shop, of course), to a bodice pattern by Sew Vera Venus. The pattern itself is only available in one size, for busts between 35 to 37 inches, and is meant for woven fabrics. Since I usually wear a 34" bust, I simply 'cheated' and made the seam allowances slightly larger, instead of faffing about with grading it down. I figured that since my fabric had quite a bit of stretch to it, it wouldn't really matter too much if I accidentally took too much in.  

Once the bodice came together, it took no time at all to make a skirt from the rest of the fabric (simply two rectangles joined at the side seams) and attach it to the top. I also cut a long strip of fabric and sewed it into a tube, to make the spaghetti straps for my dress. Probably not the best idea to use a flimsy strip of stretchy jersey to hold up your dress - I spent many minutes throughout the day tugging at the bodice and tying and retying the straps and as they had a tendency to stretch and head south as the day progressed. 

Other than that little problem (which seems to have finally sorted itself out - the straps seem to have stopped stretching), the dress itself was a dream to wear, especially on a filthy hot, humid summer day. I've since worn that dress several times, putting it to the test by cycling and even getting tangled in blackberry bushes while wearing it, and it's held up wonderfully. 
As I mentioned above, it was a pretty disgustingly sweaty type of day, so we passed the worst of it in the seemingly under-hyped treasure that is the Lille Natural History Museum (Musee d'Histoire Naturelle). There was almost no one else there except for us and the staff, so we explored the collections in peace. There's plenty of wonderful taxidermy animals in it, including the rather magnificent Ron Swanson-like snow leopard above, as well as a little tableau showing how they mount the animals for display. 

The twitchers among you might also be interested to know that the museum has a vast collection of stuffed birds, all displayed in beautiful old vitrines, including hundreds of jewel-toned hummingbirds. These were breathtaking, I spent ages staring at them trying to memorise every single detail. There are a few displays of dinosaur fossils, although nowhere near as spectacular as the displays at the Royal Belgian Institute of Natural Sciences. And, almost forgotten in a hidden corner upstairs, is a rather lonely little axolotl. It's quite a small musuem, but it's got such a still, old-fashioned air about it that it's easy to lose hours in there enjoying the various exhibits. 
Dress - self made, pattern from Sew Vera Venus, handbag - vintage, belt - Sainsburys, sunglasses - vintage

19, rue de Bruxelles
59000 Lille
France

Wednesday, 23 July 2014

None More Black Bustier Top

Hello, remember me? I fell off the blogging map for a bit. My excuse? The computer imploded, and despite being married to an IT genius, I had to survive on an ancient Mac laptop that was basically help together with several reels of sticky tape for the next few months. My hands have been far from idle during this period - this bustier is one of a number of items I've sewn up but haven't had time to blog about yet. 

I intended this to be a wearable toile, before cutting into my fancy fabrics. The material came from two old skirts - a corduroy one that had seen better days, and a velvet skirt that had already been partly incorporated into a pencil skirt. It was also lined with some scraps of double-knit jersey from my stash, to prevent any potential chafing situations. 

The bustier was based on Burdastyle 01/2012 #127 - it comes with a pattern for highwaisted pants which I will attempt sometime soon (in Spandex perhaps?). It's a relatively simple pattern, with three pattern pieces - centre front, sides and back. I also added some thick straps to it, which were traced from New Look 6675. The straps help prevent any embarrassing clothing malfunctions, and also stop me from having to hoik up the bustier every 10 seconds or so. The bustier was lengthened by about 1.5 inches, by attaching the waistband of the corduroy skirt to the bottom of the bustier. I felt that this gave it a more finished look, turning it from lingerie-style top to a proper 'outside' top.

I made it in a size 34 bust, and used the size 8 for the straps. Unfortunately, my shoulder-to-boob ratio (proper technical term) is slightly shorter than the long lithe creatures they usually design for, so the straps were just ever slightly too long. Which I only found out after wearing the top around town for a day, constantly fiddling and pulling them back up onto my shoulders. So I ended up unpicking about half the machine-sewn stitches and cutting about 1cm off the straps. The top fits so much better now but let me tell you, I could have stabbed someone with a seam-ripper when I had to do that correction.

The double-layer of thick fabric was perfect for April, which was when the bustier was finished and when these photos were taken. It was perfect over a high-waisted skirt or trousers, and under a light jacket or cardigan. However, the temperature has risen considerably since than, which means that I end up with a rather unglamourous line of sweat between my boobs. It's a very comfortable top for these warmer temperatures though, so I will be working on one of two more versions in the near future, made with much thinner fabric. 
Sunglasses - vintage (op-shop)
Necklace - op-shop
Denim jacket - Levi's (bought new about 15 years ago)
Bustier top - self-made
Belt - Sainsburys 
1970s skirt - op-shop

Friday, 23 August 2013

The Mjolnir Shorts

Look, another new post! Despite my absence from this poor ole neglected blog, I haven't been slacking off. Okay, well, maybe a little...but I've been making stuff too!

These shorts were made sooo long ago - before our summer 'heatwave' (which has since disappeared). It might be sunny in these pictures, but it was still chilly enough for the good old black tights.
The pattern is Simplicity 6337 - if you click on the link, you'll see a spectacularly mum-jeans-esque confection, styled in superbly 1980s fashion. Your first instinct might be to shy away from the computer screen. However, mum jeans (or mom jeans if you're an American reader) are now cool again, according to Elle Fanning and Topshop. 

I've been wanting a pair of highwaisted jeans for a long while, since all my other pairs of jeans were quite literally falling apart. I actually ordered the much talked about Colette Clover pattern last autumn, but worked on a toile, but found that they need way too much faffing about with, so I got lazy and gave up. Then I found this pattern for 50 cents in a Melbourne op-shop, and picked it up mainly because it was so cheap, and who can have too many patterns anyway? Not me!
The pattern languished in the dark for a while, until I found this thickish mid-blue denim, with a nice weight to it, at another op-shop. It's really stiff and sounds like thunder if you try to wave it in the air. I imagine this was what cowboys in Westerns used to wear. 

Anyway, this came together surprisingly easily. I made a toile, found it fitted pretty well, and cut into the denim. It's easy to be fearless when you don't care too much about the fabric. I did make a couple of changes to the pattern though - left out the front pockets, and moved the front fly zip to a side lapped zipper. The insides were all overlocked with my awesome new toy, a Huskylock S21.

I also added some belt loops to the waistband - which is why they are called the Mjolnir shorts. Have you ever tried sewing through about 5 layers of thick denim? It's not fun. My sewing machine definitely wasn't having any of it. Out came the hammer so I flatten the fabric before sewing the loops on, and even then it was hard going. I'm pretty sure I was sweating the whole time.
It ended up very fitted around my bum and hips (great for holding it all in after a juicy kebab), and slightly too loose around the waist. The waistband hits just above my belly button, and I had wear a belt to prevent gaping around the area. I thought I could live with it, but it eventually got too annoying and had to be altered. Which meant unpicking those pesky belt loops so I could take it in an inch around the front about about 4 inches in the back. And then sewing on the belt loops again. 

These photos were taken before the alteration, but I guess you get an idea of how it looks. They are immensely comfortable, and I've seen found that dark grey stretchy denim I purchased in Poland last year, which means there will be a long version of them coming soon. 

Friday, 10 August 2012

Park Life - Refashioned Dress

Nope, not auditioning for Singing In The Rain, in case you were wondering why I happen to be posing with a umbrella. These photos were shot on a afternoon when the sky went from frowny nacreous grey to a honey golden light - the kind that Tumblr dreams are made of - all in the space of the less-than-five-minutes it takes to walk to the local park. 
Anyway, back to this dress - another op-shop find which I rather uncharacteristically resisted buying right away, only to keep thinking about it and go back for it two days later. Of course, it was still on the same rack. What, no one else finds a sack-like, shoulderpadded 1980s muumuu desirable? You fools!

It's awesome pointed collar and lovely, soft fabric with that sort of 1950s print was what convinced me. I took it home, and decided to chop off the sleeves, unpad the shoulders, and remove some of the length. That made it a lot better, but it was still too wide. I looked like a green square. I got some elastic, and sewed it to each side of the waist seam, which brought it all in and made the dress a lot more fitted. 
Verdict? This dress is so comfortable that I've already worn it three times in the first week. It's now in the laundry suitcase waiting for a wash, and then it'll be worn again and again and again and again and again...I sure, it's like wearing pyjamas in public, except I don't look disapprovingly at my reflection and raise the corner of my upper lip. The picture below shows you exactly how smug I feel when I wear pyjama-comfy clothes in public - it's practically cheating!
Black felt hat - vintage, antique umbrella - available at the Bobbie and Lola stall, faux leather jacket - Primark, dress - refashioned, tights - Sainsburys, purple suede brogues - Marks and Spencers

Tuesday, 24 July 2012

The Playtime Playsuit

This post has been rather a long time coming. I finished the onesie (or playsuit, if you prefer) months ago, and waited patiently for a sunny day so I enact a photshoot featuring the onesie and I frolicking in the park. This being London in 2012, the rare sunny days seemed to fall on days when I was at cooped up inside. So I settled for my hospital-blue bedroom wall instead. 
The item in question came about relatively easily - a Frankenpattern involving my trusty bodice block and the highwaisted shorts I made around this time last year. The darts were moved to meet up at the waist seam, and the waistband of the shorts where removed before joining it up with the bodice. Lapped zipper at centre back to get in and out, finished off with a hook-and-eye at the top to prevent any embarrassing mishaps. Still not the most convenient of outfits to wear if you find yourself needing some...relief, though. 
Hat - Topshop, Onesie - selfmade, Belt - vintage, Tights - Sainsburys

You know what the best part of this outfit is? Besides the fact that it is a onesie, that is. It was practically FREE! The blue chambray-looking (but actually most likely polyester) fabric came from my mother-in-law, while the blue and white nautical-themed collar come by courtesy of the divine Miss Valentine
Quite pleased with myself that this little experiment turned out the way I thought it would. However, since I'm unlikely to wear this onesie much, I think it end up in my Etsy shop or Tea Rooms stall instead. 

Saturday, 23 June 2012

The Picnic Dress Refashion

Dress - refashioned, Belt - vintage, Satchel - op-shop, Shoes - Brussels, Sunglasses - op-shop
Some of you might remember this dress from my 'Handmade Holiday' post earlier this month. Well, glance down to to view its original incarnation. 
 
I know, it looks like I got swallowed by a picnic blanket, right? The dress was discovered - as with so many of my other clothes - in a local op-shop. It was clearly waayyyy to big, but I can't seem to resist red-and-white gingham. So I bought it, with the idea of harvesting the fabric to make...something. 

After trying it on back home, I realised that with a few nips and tucks, it would make a fairly nice little sundress-type thing. Grabbing my trusty seam ripper, I proceeded to unpick the skirt from the bodice portion. To make the bodice more fitted, I added waist darts to front and back. The unflattering sleeve length was dealt with, by simply hacking off a few inches. I then hacked more length off the bottom of the skirt, to bring it up to above-knee length. To finish up, a gathering thread was sewn through the top of the job, before I gathered it slightly and re-attached it to the bodice. Voila! 
Well, not quite...the puffy sleeves still made me look like I was an American football player in drag. Not exactly a good look on me. I dealt with that troublesome area by cutting two tiny pieces of elastic (each about 5cm long). The elastic was then stretched and sewn along the underside of the shoulder seams, to give a shirred effect and reduce the shoulderpadded look. 

Despite the darts, the waist area was still a little baggy, and I found it looked better with a belt around it. The dress is made of a very thin polycotton material, which turned out to be very see-through - er,  diaphanous, I mean - especially in bright sunlight. Problem? Meet solution - a part of shorts. It's the same thing I did back in school, and it makes me feel so much more confident when wearing short skirts. 

Friday, 25 May 2012

Bloomin' Marvellous

Limited numbers of handmade Bobbie and Lola bloomers are now available from I Heart Gallery in Sydney, Australia! Run by fabulous Sunny, the shop stocks a number of indie designers from around Australia, as well selected vintage items. Sunny also regularly organises markets and other fun events - check their Facebook page for more information. 

These bloomers are made from vintage tie fabric which was originally produced in Germany. If you're interested in getting hold of some but aren't anywhere near Sydney, feel free to get in touch via my Etsy shop and I'll be happy to make them to order! 

Wednesday, 29 February 2012

The Red Packet Dress

Red envelopes filled with money, known as red packets or 'hong bao', are often exchanged during the Chinese New Year. Which was the reason for my trip to Singapore - so I could give out (and receive) some of those delightful envelopes! It is also traditional to wear a new outfit for the Chinese New Year, and although I never need an excuse for a new outfit, I was very happy to work on a new dress for the occasion. 
It may have been a 'new' dress, but the fabric certainly wasn't brand new. The shiny, red brocade fabric came from eBay about six months ago - I think they started life in the 1960s destined to become curtains, but were left somewhere and forgotten about, until I got my hands on them. Curtains? No way, they were much too magnificent for that!
Dress - selfmade, Tights - Sainsburys, Shoes - Hongkong (a very long time ago)
The dress itself is fairly simple - a sleeveless, jewel necked bodice, with darts at midriff and bust, and a half-circle skirt on the bottom. I lined the bodice with some cream habutai silk - very luxurious, and very comfortable too, especially in the tropical heat. I also put in a lapped zipper in the centre back seam, using a vintage metal zipper from my stash. 

The brocade fabric is fairly thick, so I ended up with a fairly heavy dress, and I was worried that I would be sweating in a very unladylike manner throughout the day. I'd even thought of bringing a petticoat along to give the skirt even more floof, but then decided against giving myself heatstroke. Good thing I decided against that option! When the time came though, the dress actually turned out to be surprisingly comfortable, and the perspiration was kept to a very bare minimum. I'm pretty sure the habutai lining helped in keeping cool - I'm definitely a fan of it now. It may be more expensive than other kinds of lining material, but I think it's worth the expense. 
Lastly, I finished the hem with some horsehair braid (following Gertie's tutorial) to give it some shape. That handsewing very nearly defeated me - I was frantically catchstitching just hours before my flight on Friday morning. I think it was worth it though - the hem certainly stands out nicely instead of hanging limply around my knees. 

Looking like a walking, talking red packet certainly seemed to pay off during the Chinese New Year, as I ended up collecting quite a few of those wonderful envelopes during the course of my holiday!

Wednesday, 11 January 2012

Easy Skirt Refashion

A quickie sewing project to ease oneself into a new year of sewing (the previous peachy dress had been finished just before 2011 rang out). The skirt itself was purchased at an op-shop on New Year's Eve. I loved the fabric, but - as evident from the photo below - the original elasticated waistband was way too big, even for my post-Christmas feast waistline. 
The refashion itself took hardly any time. In fact, I think I spent longer unpicking the elastic than doing any actual sewing! All I had to do was to cut off the top 3 inches of the skirt, iron it out and then cut it into the required length for a new waistband. I gathered the top of the remaining skirt, put in a lapped zipper and then sewed it into the new band, with a vintage button to close it. New-old skirt is ready!


T-shirt - op-shop, Coat - vintage (from MVE), skirt - refashioned, tights - Sainsburys, shoes - H&M

Monday, 2 January 2012

Life's A Peach Mini-dress

Happy New Year, readers! I thought I'd kick off 2012 with yet another sewing post - those who come here for the food will have to hang on for a while more. I purchased the original pattern from eBay about 6 months back, with the intention of making up the traditionally Chinese style in an unconventional fabric (wear a cheongsam in any kind of shiny/floral/shiny and floral fabric and people automatically think you're a waitress in a fancypants Chinese restaurant. Try it if you dare). 
Original cheongsam-inspired pattern

However, after deciding that I wasn't willing to endure the drastic dieting needed to whip my figure into the required hourglass shape for such a fitted style, I decided to simply redesign the skirt portion of the dress. Yes, re-doing a pattern is much easier for me than just eating less. I wanted to keep the bodice section but attach a much fuller skirt on it. This was easy enough - I simply cut the pattern off at the waist while tracing it out onto paper (I always do this with all my patterns, in order to keep the originals as pristine as poss). The skirt would then be a simple circle or rectangle skirt, gathered at the top for the requisite fullness. 

I've got some shiny red brocade fabric in mind for the 'proper' dress, but decided to make a wearable toile of it first just to make sure it all worked. The fabrics came from various op-shopping expeditions - I was going to make a circle skirt for more twirliness but realised there wasn't enough of the shiny fabric for that, so settled for a simple gathered rectangle instead. 
You may have noticed that the collar in the pattern illustration met much closer together - I decided to leave some space in between when making mine up, for two reasons. Tight necklines such as this often leave me feeling slightly suffocated, especially on hot days, and a wide band of fabric around my neck is not that flattering when the neck in question is as short as mine. 
Lace trim around hem 

Bow detail made from the remnants of both fabrics. 
The finished dress was okay, but not that exciting. It needed...more. I finished the hem off with some pink nylon lace that I purchased ages ago, and then sewed a double bow on the back. The final product reminds me a little of a bridesmaid's dress (a feeling compounded by all that peach fabric used), but that's no bad thing, right? 

Friday, 30 December 2011

Burdastyle Feature and Poncho-Cape Thing

Can you believe it's nearly 2012 already? I hope everyone had a great Christmas/holiday period - pictures of my epic Christmas feast will be posted soon. I received some lovely presents, and a pretty awesome one from Burdastyle. The sewing website made me its featured member this week. You can see it here, - the article includes some pictures of my past projects as well as a short interview about my sewing habits.  
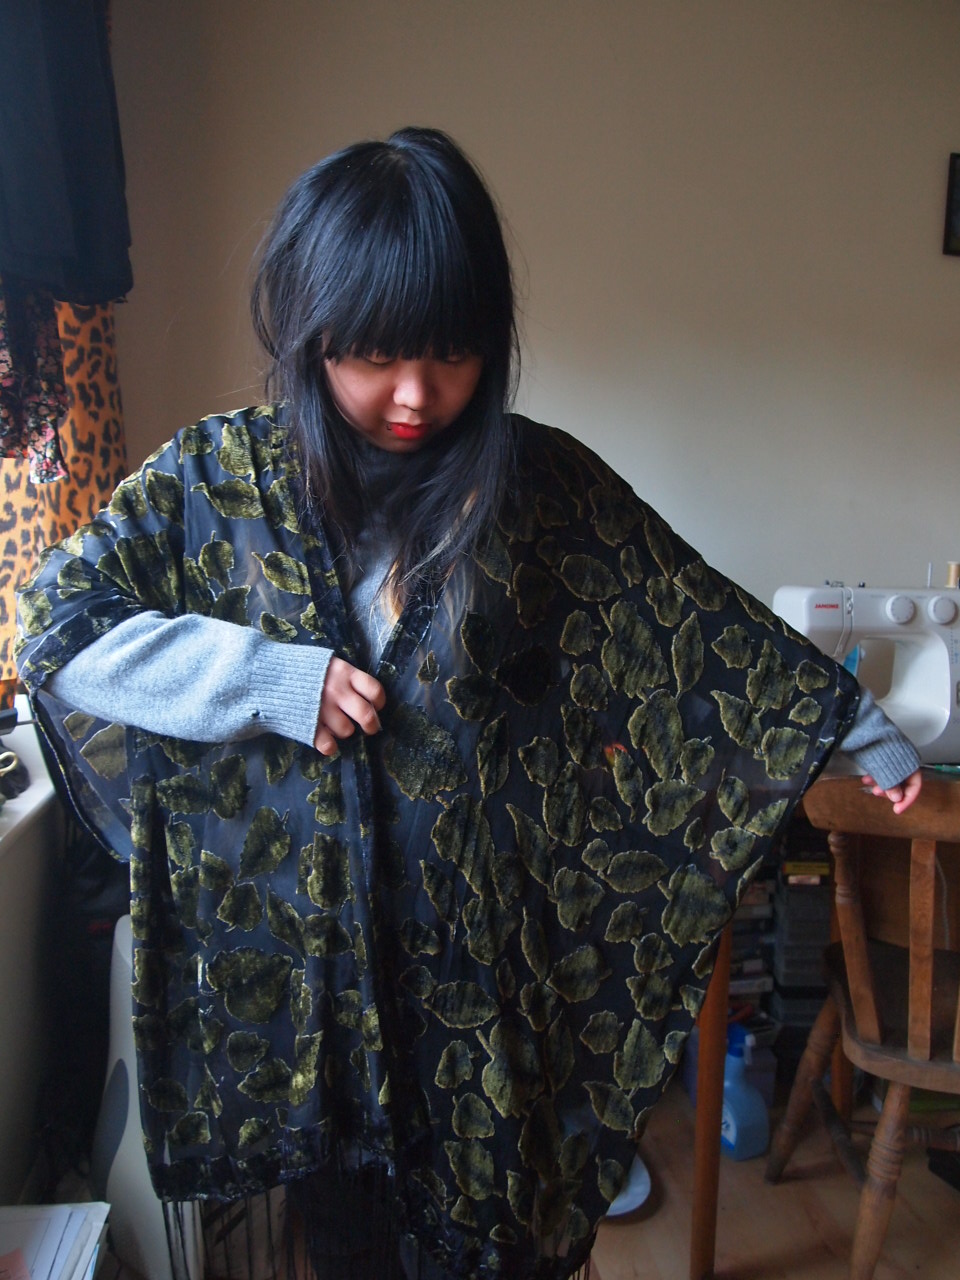
I thought I'd try to tie that in with these photos of a poncho/kaftan/cape thing I made recently. I've actually made four of them, they were commissioned by the lady who runs a neighbouring stall at the Tea Rooms. If you're interested in them and in or around the London area, you can purchase them from the Tea Rooms or her Thursday stall at Spitalfields
These are extremely simple to make. In fact, they're great beginner projects for those wanting to dip a toe into the sewing ocean. You'll need two long scarves of the same size - they don't even have to have the same design on both if mismatched is what you're into. All you have to do is to sew one edge of the scarf together and leave a hole at the top large enough for your arm to go through. Do the same to the other scarf, then sew both scarves together about halfway up to join them together. 

I've just realised that what I wrote probably makes no sense to anyone else whatsoever...Is anyone interested in a step-by-step tutorial with photos?
In case I don't get around to writing up another post tomorrow - Happy New Year everyone!

Thursday, 8 December 2011

Winging It - Refashioned Man's Shirt

Men's shirts can be rather boring, can't they? I have a number of them laying around, thanks to Manbacon. The worn out ones have been turned into rags, but those in good condition are great for quick refashioning projects. 

For this blouse, I started by taking apart all the seams of the original shirt, so I was left with a number of flat pieces of fabric. I then traced out a bodice pattern and re-sewed the blouse, turning it around so the buttons were on the back.
The shirt cuffs and collar came from a rather baggy 1980s dress I'd cut up a few months ago. It was going to be a sleeveless top so I had no real need for the cuffs. However, I decided to stick them on the shoulders of the blouse in a fit of fancy. Voila, wings! Or wing-like structures...
The collar turned out to be that bit too small for the neck of the new blouse ('measure twice, cut once' evidently not one of my favourite phrases). I got around the problem by attaching a length of vintage seam vintage to each side of the collar to function as ties.

And there you go - an easy refashioned blouse!
Blouse - refashioned, skirt - selfmade (available on Etsy),