Sunday 28 February 2010

Recycled Padded Envelopes - A Tutorial

If you're like me and do a fair bit of wheelin' and dealin' on the interwebs, you probably end up with lots of used, padded envelopes piled up precariously too. The little recycled padded envelopes shown here can be made in various sizes, don't take much time to whip up, and won't cost you any money at all!

You'll need:
Large padded envelopes
Scissors (DO NOT use your best fabric scissors!)
Glue (I used Copydex, nut you can use any kind of paper glue) 
Scrap paper (Magazines, catalogues, wallpaper, newspaper etc)
Sewing machine
Thread
Sewing needle (if you haven't got a sewing machine)

Here we go!
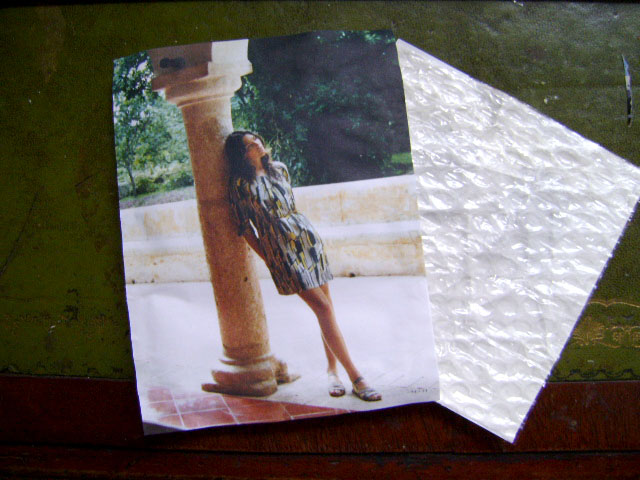
1) You'll need to transform this huge padded envelope (above) into this (picture below). Start by splitting the front and back of the envelope apart, so you get 2 pieces of padded goodness. Then, fold the separated parts into halves or quarters, depending on the size you want to end up with, and cut them up into into 2 or 4 parts. Those will be the front and back bits of your new and improved, little padded envelopes. Trim the bit that you'll use as the back so it's about an inch shorter than the front - this way, the longer portion forms a flap that you can simply fold over and tape when you need to post something.

2) Still with me? Ok, good. Now, get the scrap paper that you want to use on your envelopes, and trim them so they're just slightly larger than the padded pieces. This makes it easier to glue them on. Put glue on the front of the padded pieces (the side with the paper, not the bubble-wrap).You don't need to glue the whole piece, just a dab on all for sides will do, then stick them onto the back of the scrap paper. Trim the overlapping paper bits away, so the edges are all flush. 

Do the same for all your padded pieces.

3) Let the glued pieces dry (overnight is best, but at least 4 hours if you're in a hurry). This is so the glue doesn't make your sewing needle all sticky.

Time to sew. Set your machine to a zig-zag stitch (if you haven't got one on your machine, just go over it a few times). 
Place the front and back envelope pieces together, wrong sides (i.e bubble-wrap sides) facing each other. Turn it around so the shorter, back side faces you, and start sewing. You'll only need to sew around three sides, leaving the top open so you can slip your goodies in later. Backstitch a couple of times at the beginning and end, and at the corners of the envelope, to make it more secure.

4) Cut the hanging bits of thread off, and voila, you're done! Congratulations, young grasshopper, you've made a fancy little recycled envelope! Now go make more...

Tips and suggestions and other stuff - I made my envelopes fairly small (about 6 x 7 inches) but you can, of course, make yours any size you like/need. If you need a huge envelope, you can always just glue some scrap paper or newspaper all over it, and re-use it. 

I used some pages from a Toast catalogue for the example above, and some pages from a travel catalogue for the others. You can use any kind of paper you have laying around - newspapers, wallpaper, wrapping paper, whatever. If you're going to pop these into the post, it may be a good idea to leave the front fairly plain, and make the back a little fancier, so it's not too distracting for the postie. 

If you haven't got access to a sewing machine, or you're simply not up for abusing your machine like I do, you can always sew the sides up using a needle and thread. I think a nice blanket stitch would make it fairly secure, and you can use some yarn or embroidery floss for something a little fancier. It takes a little more time, but at least your sewing machine won't be making any angry noises.

Wednesday 24 February 2010

Happy Birthday To...Me?

Well, it's not my real birthday, but I had at look at my Etsy shop and it turns out that my partner-in-crime Googy and I set it up nearly a year ago! Things have been chugging along slowly but fairly steadily since then, and I've been having lots of fun making things and pretending I own a shop. 
Anyway, because we've made it this fair (I'm surprised, and frankly, touched that people have been shelling out for some of my creations) Googy and I have put everything in the shop on sale. Everything in the Bobbie and Lola shop is currently 10% off, and if you read our shop announcement carefully, you'll be able to find out how to get another 10% off! That's right, reading is useful sometimes - your eyes may lead to you a 20% off sale if you're lucky. Sure, we're no Alexander McQueen, but give us time and we just may be able to produce some crazyawesome hoof-shoes too!
In the meantime, we're updating the shop with new pouches and other items, and they will all be 10% off too. Click on the photos to take you direct to the item in the shop if anything catches your fancy.

News just in! The wristlet up top has just been featured in a treasury along lots of other lovely items. Wee!

Monday 22 February 2010

Eat Your Heart Out

Some cupcakes I whipped up for a dinner party last night. The recipe comes via The Times website, and was contributed by Konditor and Cook. I first tasted the professionally baked version in January, when my friend H ordered the lemon chiffon cake for his birthday lunch. Though we all agreed that it was slightly too sweet, it was fairly enjoyable. When H let on that the recipe was available on The Times website, I mentally filed it away for future reference, then promptly forgot all about it (my brain is as messy as my room).

Anyway, I took the opportunity to try it out for myself yesterday, mainly because I wanted to see if I could make my version fancier than the K&C one, and also because we were going to bring a cake along to the dinner party anyway. I absolutely loathe storebought, fondant-covered birthday cakes, so tried to make mine as festival as possible, in honour of the host's birthday last Thursday. 

The recipe is fairly basic, although I had to make a few tweaks to the frosting, which still turned out far too sweet anyway. I added lime zest and the juice of about a quarter lemon to it for a stronger flavour, and also added a little bit of green food colouring to it, mainly because I liked it. The frosting was topped off with pieces of lime and lemon peel for a more colourful look. My frosting was also made with a 50-50 mixture of mascarpone and cream cheese, as I feel that mascarpone adds a creamier texture to it. And because I just like mascarpone. Oh, and I left out about 100gms of the recommended 640gms of icing sugar, since it was already toothachingly sweet. 

Let me know what you think if you do try this recipe.

On an unrelated note, look what I got in the mail from Sunny - sexy little porno earrings! She has lots more vintage porn jewellery in her Etsy shop, so I'd recommend you checking it out if you're feelin' naughty.

Saturday 20 February 2010

Automatic Shoes

I'm sooooo bad with getting my film developed once I'm through with a roll. There are about 12 more rolls from months ago, just hiding around my room. These ones here are from a couple of rolls from last October/November that I just got around to scanning in last night.

They were taken with a Miranda SL-X, which is a point and shoot with inbuilt flash. I'm not sure if this was really made by Miranda, or if they just licensed the name to some other company. There's a line on the bottom that says 'Made In Hong Kong', and I bought it in off eBay, in a job lot with 3 other cameras (I spend my free time on Ebay buying old cameras and bias binding, I am soooo cool!). I found the flash too harsh, so I've taped it over with a bit of masking tape in a low-tech attempt to 'soften' it. It's got a fairly crappy, plastic, fixed focus (f4.5, 34mm, for those who need to know) lens, and a lowlight sensor that deploys the flash when the camera thinks the scene is too dark. You need to load it up with two AA batteries before use; that powers the internal motor which winds the film on.


All in all, it's a fairly dodgy but idiotproof camera, and I love the fuzziness of the images I get from it. It's a lot easier taking 'drive-by'-type photos with this, than my larger Canon SLR. Other photographers may sneer, but I'm not too fussed about getting technically perfect, super clean photos from my cameras, so this suits me well. Anyway, I did spend most of my time in SCA messing around with homemade pinhole cameras and scratching my negatives on purpose, so this is sort of a step up, in a way. 


Thursday 18 February 2010

Dragon Castle Dim Sum

Plain rice noodle rolls (left) and fried turnip cake (centre)
Two-in-one celebrations require twice the amount of food, right? Since Valentine's Day and the Lunar New Year both fell on the same day this year, I felt it was my duty to eat for two (no, I'm not pregnant, I'm just fat!).

If you've read any of my other paltry attempts at 'restaurant reviews', you're probably aware that I tend to order  waaaayyyy too much food; I wonder if my being born in the Year of the Pig has anything to do with it?

Anyway, The Mancreature and I trooped down the hill to Dragon Castle, just behind the Elephant and Castle. It's hard to miss, housed in a Soviet-style blue square building with huge red doors and the obligatory pair of stone lions standing guard in front. We got there just after they opened, which proved to be a good decision, as the place started filling up pretty soon after that, and there was a fairly long queue by the time we left.

On to the food; I'm not exaggerating when I said we ordered too much. The thing about dim sum is that everything seems so deceptively tiny, so you keep ticking off the dishes until, before you know it, you've got 11 dishes on the list, and someone (it wasn't me, I swear!) says "Let's make it an even 12." Infamous last words, indeed.

(A note on ordering: this isn't one of those places where you have the ladies pushing trolleys of food around, so you can't point at what you fancy. There is little dim sum menu with numbered pictures of the dishes, and the names of the dishes are in both English and Chinese. You'll have to tick off the dishes you want on a piece of paper provided - its got names in Chinese, so if you can't read Chinese, just match the numbers up. There's also a separate a la carte menu you can order from.)
Minced prawns wrapped in fried bean curd skin.
I didn't take photos of everything we ordered (because I was too busy chowing down) and I can't remember everything that I ordered, so I'll just describe what I remember.

Fried turnip cake (first photo): sooo good! It was soft and smooth on the inside, with little bits of Chinese sausage scattered around, and the crisp, fried bits on the edges were just right. Best of all, it wasn't too greasy, so I didn't feel like I was just sucking down oil, even when it got cold.

Minced prawns in fried bean curd skin (second photo): Possibly my favourite item. Juicy pink prawns with a really 'bouncy' tender, wrapped in crispy layers of golden fried bean curd skin. Bean curd skin is really underrated, it's awesome!

Plain rice noodle rolls (left, first photo): These are called 'cheeong fun' in Cantonese, I think. We ordered the plain, steamed ones, and they came in a little layer of soy sauce and sesame oil, which kept them from getting dry. They also gave us a little dipping bowl filled with hoisin sauce and peanut sauce (like a really smooth, more liquid version of peanut butter). I've never had them with that peanut sauce before, and I'm definitely a convert! I reckon I could eat it for breakfast for a whole week (not more than that though, I'd probably get bored with it).

Steamed turnip dumplings
Steam turnip dumplings (both photos above): I think these were the Mancreature's favourite. They have some minced pork and bits of peanuts in them, and they were surprisingly most inside, unlike the...

Shanghai Xiaolongbao: Ok, maybe it's just me being stupid, but I always thought that a 'Shanghai xiaolongbao' had broth inside them? They were described as 'Shanghai minced pork dumplings' in English, and the Chinese characters seemed to say they were 'xiaolongbao'. My Chinese is fairly rudimentary though, so it could have been my fault. Anyway, these ones didn't have any broth in them, just a lot of very dry pork. I had one and could barely finish it. 
Har Gow (steamed prawn dumplings)
Har Gow (photo above): I order har gow as a yardstick to test how good a dim sum place is. There's no good reason for that, now that I think of it. I just like these dumplings, and they're fairly simple, so I tend to think a place is no good if they can't even pass the 'har gow test'. Dragon Castle's were awesome - pale pink balls of prawn wrapped in soft, yet firm and translucent skin. I didn't even dip them into any sauce because I just wanted to enjoy the unadulterated taste of them. (Oh, by the way, they actually come in fours, I ate one before I got around to taking a photo.)

Steamed beef balls in bean curd skin: Bleuurgghh! The bean curd skin couldn't even save these from being crap. They just tasted weird - a little too vinegary, and bland too. I've never ordered them here before, so I don't know if it was just an off-day, or if that's how they are. 
Siu Mai (more steamed prawn dumplings)
Siu Mai (photo above): More steamed prawns - not horrible, but not especially memorable either. They come in fours too, one of us ate one before this photo was taken. 
Mango pudding
Mango pudding (photo above): Another of my inexplicable 'dim sum yardsticks'. This was sitting in a pool of condensed milk, giving it just the right touch of sweetness (the pudding itself isn't very sweet). The pudding was very creamy, unlike the more jelly-like ones you get at some places. I love it - not so sure about that glace cherry on top though.
Steamed bun with lotus paste filling
Steamed buns with lotus paste filling (photo above): I love you, my little bunny-wunny. There was also half a salted egg yolk instead, which was a pleasant surprise. It was like eating a light, fluffy version of a mooncake. I find most mooncakes too dense, but I could have eaten at least 4 of these on my own, if I wasn't so close to exploding. 

Dragon Castle
100 Walworth Road
SE17 1LJ

Tuesday 16 February 2010

Everything Must Go!

Help a girl out - the lease on my current flat runs out at the end of March, and I'm in the midst of looking for new flats, and packing frantically. And I've discovered that I own lots of stuff...I swear I didn't even buy some of that stuff, they just appeared, like leprechauns. 
Anyway, I'm listing a few items on my blogshop, in the hopes that I'll sell them before I move and won't have to pack them up. I've got a couple pairs of shoes up there now, and I'll be posting a few other items soon, so please keep checking back over the next few weeks to see if there's anything that may suit you. 
I've also got a whole stack of minty green bias binding, so I'm listing them in 10 metre packs in my Etsy and Artfire shops. I'll be happy to sell more than 10 metres at a time too, should you guys need it.
So, while it's not really an 'Everything Must Go' sale, I certainly would like to get rid of some stuff before I move, and I would be sooooo grateful to you guys if you'd just help me spread the word. 

Anyway, speaking of Etsy, I've been hard at work on a 'Spring/Summer' collection, and more capes, so keep an eye out!

P.S. If you're in the London area and would like to meet up to receive an item instead of paying for postage, just drop me an email and we can work something out.

Wednesday 10 February 2010

A Veritable Trevor Trove!

I made some new friends at the op-shop on Saturday. Their names were Chadwick...
and Dorcas.
Some of them were much too shy to tell me their names, but I invited them all home with me anyway.


Sometimes, it's great being short. If I were further from the ground, my eyes wouldn't have alighted on a rather unpromising looking John Lewis bag and I wouldn't have ventured over to take a peek and discover these treasures. Just over one kilo (I weighed it on my kitchen scales when I got home) of wondrous old thread, all for the embarrassing price of £1.50! A bag of spinach costs more than that! Some of them, like Chadwick up there, are still in their original wrapping, while some spools were nearly empty. The yellow ones up there feel like silk. I'm not sure how I'll use them all yet, but I'm so happy they came home with me. 

Monday 8 February 2010

Root Vegetable Gratin

Inspired by this recipe from the ever-erudite Weird Vegetables blog, I sliced up some parsnips, celeriac, carrots, swede and potatoes, and soaked them in a warm bath of chicken stock and cream.

It was the best of friends with a slice of pork and some watercress, all devoured while watching some vintage Dr. Who (this time with Jon Pertwee in a rather magnificent cape).