Showing posts with label recipe. Show all posts

Monday, 14 April 2014

Mocha Choca Madeleines

Having chanced upon some madeleine tins while in Calais in November last year, I returned to London with all the best intentions of churning out try after tray of the tiny delicacies. I would be making madeleines every weekend, my kitchen would be filled with edible seashell shapes in all colours of the rainbow, all with different flavours. Best-laid schemes of mice and (wo)men, and all that...and so the tins languished in my kitchen cupboard for the next few months. 

Anyway, Ari sent me a link to that John Whaite off the GBBO's* recipe for madeleines flavoured with chocolate and coffee. They sounded tasty, and not too complicated. So I gave them a go. He also includes a recipe for a cocoa-flavoured dipping sauce, but I left that out and simply dusted with icing sugar instead.

*That's Great British Bake-Off for those of you not au fait with today's yoof slang. 
Mocha Choca Madeleines (adapted from John Whaite's recipe for the Telegraph)

Ingredients
100g salted butter
2 eggs
100g caster sugar
1 tsp coffee extract (I used this)
85gms plain flour
15g cocoa powder

Directions
- Preheat the oven to 190 degrees C.

- Melt the butter in a saucepan over a medium heat, then set aside.

- Put the eggs, sugar and coffee extract into a mixing bowl, and beat with an electric whisk until light and fluffy, and tripled in volume. This should take about 12 -15 mins.

- Sift the flour and cocoa powder into the egg mixture, then pour in the butter. Gently fold these into the egg mixture until smooth and silky.

- Fill the madeleine moulds about 2/3 full, then bake for 8 - 10 mins or until the madeleines look slightly browned around the ages. Turn them out of the tin as soon as they are baked or they will stick. Lightly dust with icing sugar or cocoa powder (optional). 

Friday, 31 January 2014

Ginger Quince Upside-down Cake

Let's return to our regular blogging schedule now, shall we? Regular readers may remember that quinces are one of my favourite fruits, so I couldn't resist an opportunity to add them to a cake when I found a couple of huge specimens at the General Store

This particular recipe was inspired by Yossy Arefi's version, and combines some of my other favourite flavours including ginger and molasses. It's especially comforting on a rainy winter day, with a steaming cup of tea, but if quinces aren't in season (or you simply can't find them where you are), they can always be replaced by apples or pears. 
Ginger Quince Upside-down Cake (adapted from Apt. 2B Baking Co.)

Poached Quince 
1 large quince (or 2 small/medium quince)
3 cups water
1/2 cup sugar
1/4 cup honey
1/2 lemon
few strands of saffron
1 tsp vanilla extract
1/2 tsp ground cinnamon

Directions
- Mix all the ingredients (minus quince) in a saucepan, and bring to a simmer.
- Cut, peel and core the quince, and plop them into the simmering pot. Put a lid over the top, covering about half the pot. 
- Simmer until tender (at least an hour). Leave quinces to cool in the syrup* until ready to use. This step can be done the day before.


Ginger Cake (adapted from Apt. 2B Baking Co.)
Topping
1 1/2 tbsp butter (room temperature)
1/4 cup brown sugar
poached quince, cut into wedges

Cake
115gm unsalted butter
6 tbsp light brown sugar
2 large eggs
1/3 cup molasses (or black treacle)
2 tsp ground ginger
1 1/2 cups plain flour
3/4 tsp baking powder
3/4 tsp baking soda
1/4 tsp salt
1 tsp cinnamon
1/4 tsp nutmeg
3/4 cups milk

Directions
- Preheat oven to 180 degrees C. Grease a high-sided 7" cake tin, and line the bottom with baking paper. 

- Topping: In a saucepan, mix butter and brown sugar, and cook over medium heat for about 1 min. Pour mixture into bottom of cake tin, and cover bottom of the tin with quince slices. Put aside with preparing cake mixture.

- Cake: In a large bowl, cream butter and sugar until light and fluffy. Add ground ginger, mix for 1 more min. Add eggs one at a time, then pour in molasses.

- In another bowl, whisk together the flour, baking soda, baking powder, salt, cinnamon and nutmeg. 

- Alternately, add dry flour mixture and milk to the batter in first bowl, being careful not to overmix. Pour batter into cake tin and smooth the top.

- Bake for 45 mins or until golden brown (a skewer inserted into the middle should come out clean). Let cake cool in tin for about 10 mins, then invert onto a plate and peel away baking paper. 

Enjoy warm, with clotted cream or vanilla ice cream.

*The leftover poaching liquid is delicious as cordial - pour a bit into a glass, and top up with sparkling water.


Friday, 12 July 2013

Easy-Peasy Squidgy Loaf

Not exaggerating at all when I say this loaf is easy-peasy - once you've got the ingredients ready, all you really do is dump them all into a big bowl, give it a couple of stirs, then into a loaf tin and to the oven it goes. This is also, quite accidentally, perhaps the healthiest baked item to ever appear on this blog - no butter, no eggs, hardly any sugar, plenty of fibre. It makes me think of a homemade version of Soreen. That probably makes it sound like really boring, but well, it's not! It's packed full of flavour from the dried fruits, and goes especially well with butter. 

The inspiration for this came from baking buddy Yusuf, who has published the original recipe on his Snapguide thingo. It sounded so yummy and I was all proud of myself for getting a bag of coarse wheat bran to make it, then I got home and looked through the cupboard and realised I didn't have the essentials - stuff like self-raising flour, muscovado sugar and...oh yes, he also said 'bran flakes' not 'wheat bran'. Turns out I'm not very good at reading through something before jumping straight in. This is how accidents happen. 

Anyway, I was much too lazy to go back to the shops to get the right stuff - and doing things the 'right' way is so boring and I'm my own boss! - so I decided to make do. And it turned out pretty tasty if I say so myself. Just don't tell Yusuf. 
Squidgy Malt Loaf (inspired by Deco Reco's Raisin Malt Loaf)

Ingredients
300 ml milk*
200gms dried cranberries**
25gms candied ginger
150gms plain flour
pinch of baking powder
pinch of bicarbonate soda
100gms caster sugar***
50gms malt extract****
1 tsp ground cinnamon
1 tsp nutmeg
lemon zest and juice (optional)

Directions
- Preheat oven to 160 degrees. Grease and line a loaf tin.

- Into a large bowl, add the milk to the wheat bran and set aside for a few minutes so the bran soaks up some of the milk. Add  the cranberries and ginger to the mixture, before adding in the sugar. Add your spices and the malt extract, and finally, add the flour. Fold it all together with a wooden spoon. If using, add zest and juice of lemon now.

- Transfer the mixture to the loaf tin and smooth the top of the mixture down. Bake for 45 minutes, then switch the oven off and leave the loaf in the oven for another 30 minutes. Take it out and let it cool down, or slice and serve straightaway (with butter!).

Some notes
*The original recipe has whole milk in it but I used some rice milk, and you could probably even make do with water too if you haven't got any.

**The cranberries were soaked in hibiscus tea for about half an hour until they plumped up. Of course, I understand not everyone has easy access to multiple packs of dried hibiscus petals, in which case you can simply use just-boiled water or your favourite tea. I used hibiscus tea because I like the slight sourness it imparts.

***Optional - I've left it out on my next few attempts and the loaf has been fine, just not as sweet and a tiny bit less squidgy.

****Can be replaced with honey, or golden syrup or treacle or some other viscous syrupy item of your choice. 


Friday, 21 June 2013

Sweet Potato and Purple Potato Gratin


No need to adjust your colour calibration - some of the potatoes here are indeed purple. If you need to impress anyone, this dish will certainly do it. The contrasting colours and rosette-like appearance pack a punch when brought to the table in its baking dish, and it looks more complicated than it really is. In fact, if you have a mandolin, it can all be prepared in mere minutes. Just be careful not to slice your fingertips off - nobody wants bloody fingertips in their portion of gratin.

The dish was inspired by two events in close succession - the discovery that our local supermarket sold purple potatoes, as well as our recent purchase of Ottelenghi: The Cookbook from a secondhand bookstall in Greenwich Market. Ottolenghi's version calls for just orange sweet potatoes, but I decided we could possibly do one better. If you can't find purple potatoes, than 50% normal potatoes and 50% percent sweet potatoes, or even 100% sweet potatoes, would do just as welll. 
Sweet and Purple Potatoes Gratin 
(adapted from Danielle's Sweet Potato Gratin in Ottolenghi: The Cookbook)

Ingredients
about 750gms purple potatoes
about 750gms sweet potatoes
5 tbsp sage (roughly chopped), plus extra for garnish
6 garlic cloves (crushed)
2 tsp coarse sea salt
1/2 tsp black pepper (freshly ground)
250ml whipping cream

Directions
- Preheat oven to 200 degree C. Wash the potatoes but leave them unpeeled. Slice them into discs roughly 5mm thick.

- Mix the potatoes, sage, garlic, salt and pepper together in a large bowl. Arrange the potato slices in a medium-sized baking dish by taking stacks of them and packing them next to each other*. Any any remaining bits of garlic and sage from the bowl to the potatoes. Cover the dish with foil and roast for 45 minutes. 

- Remove the foil and pour the cream evenly over the potatoes. Roast, uncovered, for another 25 minutes. The cream should have thickened by the end of the cooking time. 

- Garnish the dish with sage, and serve immediately. 

*I arranged the potatoes by placing them first along the outer ring of the dish, then working inwards, to create the rosette shape. There's no need to be too precious about placing the different colours one of top of the other.

Monday, 12 March 2012

Herman zee German Friendship Cake

It may go by the sweet, innocuous name of 'German Friendship Cake', but anyone who receives a containerful of pale brown, fermented slop is likely to question their commitment to carrying on that friendship. Trust me, I was one of those who received said containerful of slop last weekend, and was this-close to breaking off a nearly two decade old friendship.

Wait, what the hell am I on about? Let's start from the beginning, shall we? At the Bake Club meeting last weekend, we were told by Haryo, that week's host, that he had a little something for us to take home. That turned out to be Herman, the sourdough starter essential for baking the Friendship Cake. We were given instructions to stir Herman daily, feed him at a specified time, divide him into four and pass him on to 3 other unfortunate souls, and then finally, to bake him up according to the instructions.

It's the cakey equivalent of those email chain letters from the 90s. Haryo had received it from his friend, who had probably received it from his friend...Needless to say, we were none too please to be burdened with caring for what was, essentially, a living thing. I mean, it had a name and everything! And there it was, bubbling and frothing away beside us...
A quick search on the interwebs will tell you that Herman seems to be pretty trendy these days (well, trendy for bakers, that is). My mum-in-law remembers it being a big fad back in 1980s Poland - she made and passed around a few Hermans herself back then. Maybe us Baker Clubbers are just a bunch of unfriendly anti-social grumps? Anyway, we decided not to risk our friendships, and duly brought Herman back, cared for him and then baked him. 


The full set of instructions are available here. There are also instructions for creating your own monster Herman in that link, if you're so inclined. I must confess to deviating slightly from the recipe - mainly using less sugar, but also a number of other ingredients. Here it is, in case you wish to bake something similar.

Herman The Friendship Cake (adapted from here)

Ingredients
225gm plain flour
120gm caster sugar
2 eggs
2 tsp vanilla extract
2 heaped tsp ground cinnamon
2 heaped tsp baking powder
1/2 tsp salt
160ml vegetable/sunflower oil
2 cooking apples, peeled, cored and cubed
50gm walnuts
50gm almonds
50gm prunes, cut into cubes

For topping
50gm brown sugar
50gm butter

Directions
- Preheat oven to 175 degrees C. Mix everything together and place into a large lined baking tin (mine was 9 inches by 11.5 inches)

- Sprinkle with 50 g brown sugar and 50 g melted butter.

- Put into the oven and check cake after 25mins, using a skewer. If the skewer is clean when removed from cake, then Herman is ready!  It may take 45 mins to an hour to bake through, although mine only took 25 mins due to the larger size of my tin. 

- Allow him to cool and then enjoy!

Friday, 6 January 2012

Christmas!

It's taken a while, but I'm finally getting round to posting photos of my Christmas feast. We decided to have it at home this time, and celebrated it on Christmas Eve with the delightful Miss Kitty Valentine, my cushion-making partner in crime Aldona and her family.

In true over-the-top Polish tradition, our dinner consisted of at least 12 dishes (since I'm not actually Polish, I don't know if it is true that a Polish Christmas dinner has to include 12 dishes, it's just what I've been told.) 
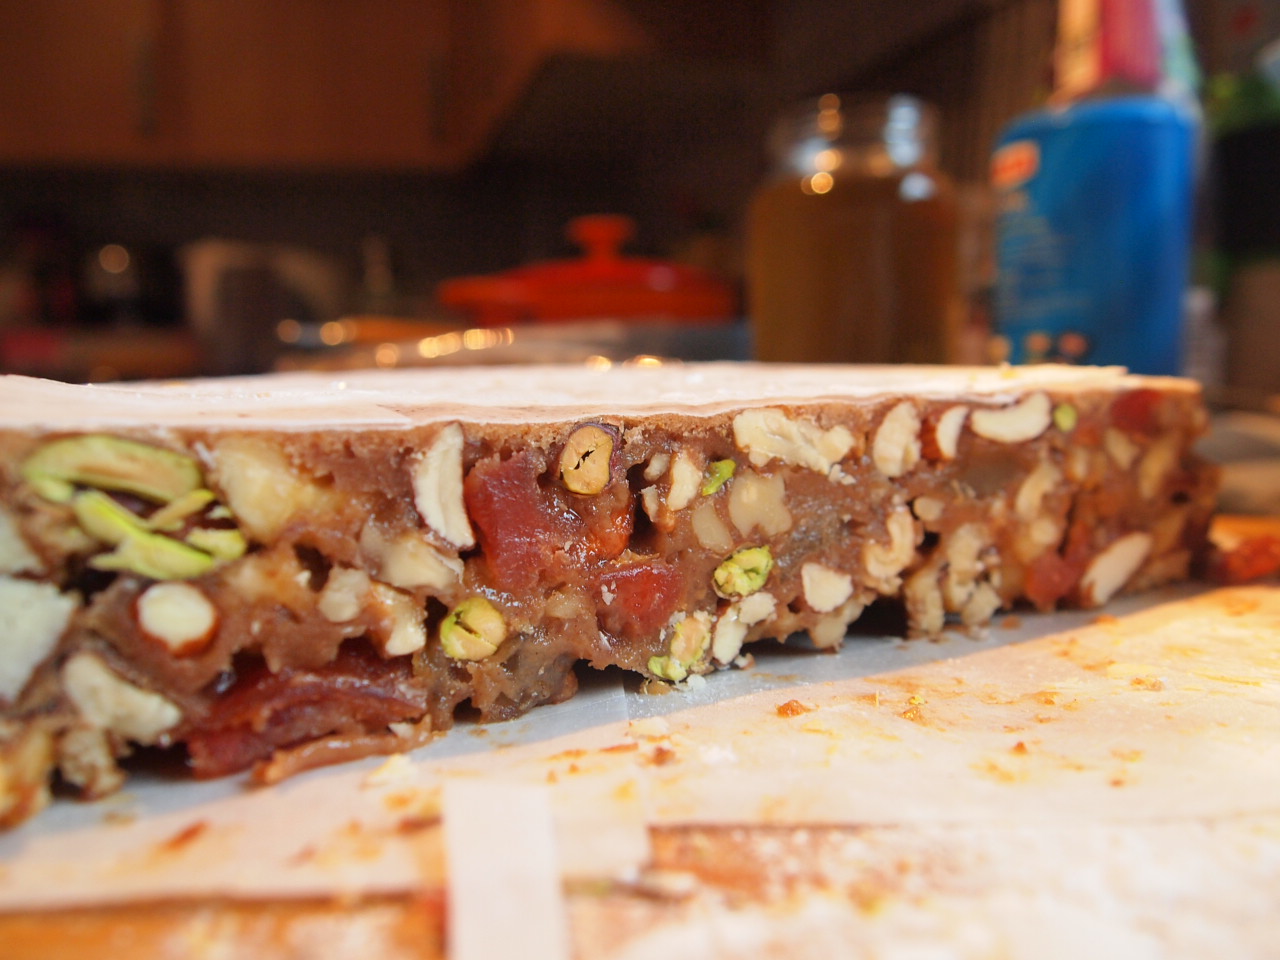
The coffee table had an array of sweets - (from top), homemade panforte, a quince, ginger and walnut cake based on this recipe, and some untraditionally shaped gingerbread biscuits (gingerbread T-rex, anyone?). Aldona also brought along some makowiec (poppyseed cake) and more biscuits.
The star of the night, a perfectly roasted goose! Manbacon (who can be partially seen behind the bird) cooked the goose himself, following a great recipe by the Hairy Bikers. He also managed to rustle up succulent salt beef, as well as plenty of delicious apple and pork stuffing. 

£10 notes to wipe our greasy hands and lips on, because we're hedonists and filthy rich. You can't see it, but we also had a stack of £20 and £50 note-napkins. 
Wild mushroom dumplings in beetroot soup (above), as well as some bigos, plenty of cured pork products, some marinated herrings, and possibly some other stuff as well. 
The aftermath - empty vodka bottles, half-finished bowls of soups and stews, burnt-out candles, crumpled napkins and wrapping paper, plenty of half-eaten food, and one stained tablecloth. Our guests were sent away with boxes stuffed full of food. 

Saturday, 24 December 2011

Cooking For Christmas - Candied Quinces

Regular visitors to this blog will probably be aware of my love of quinces by now. I strive to use them in a couple of recipes whenever they come into season, so I knew what I was going to do with them as soon as I read through this panforte recipe.

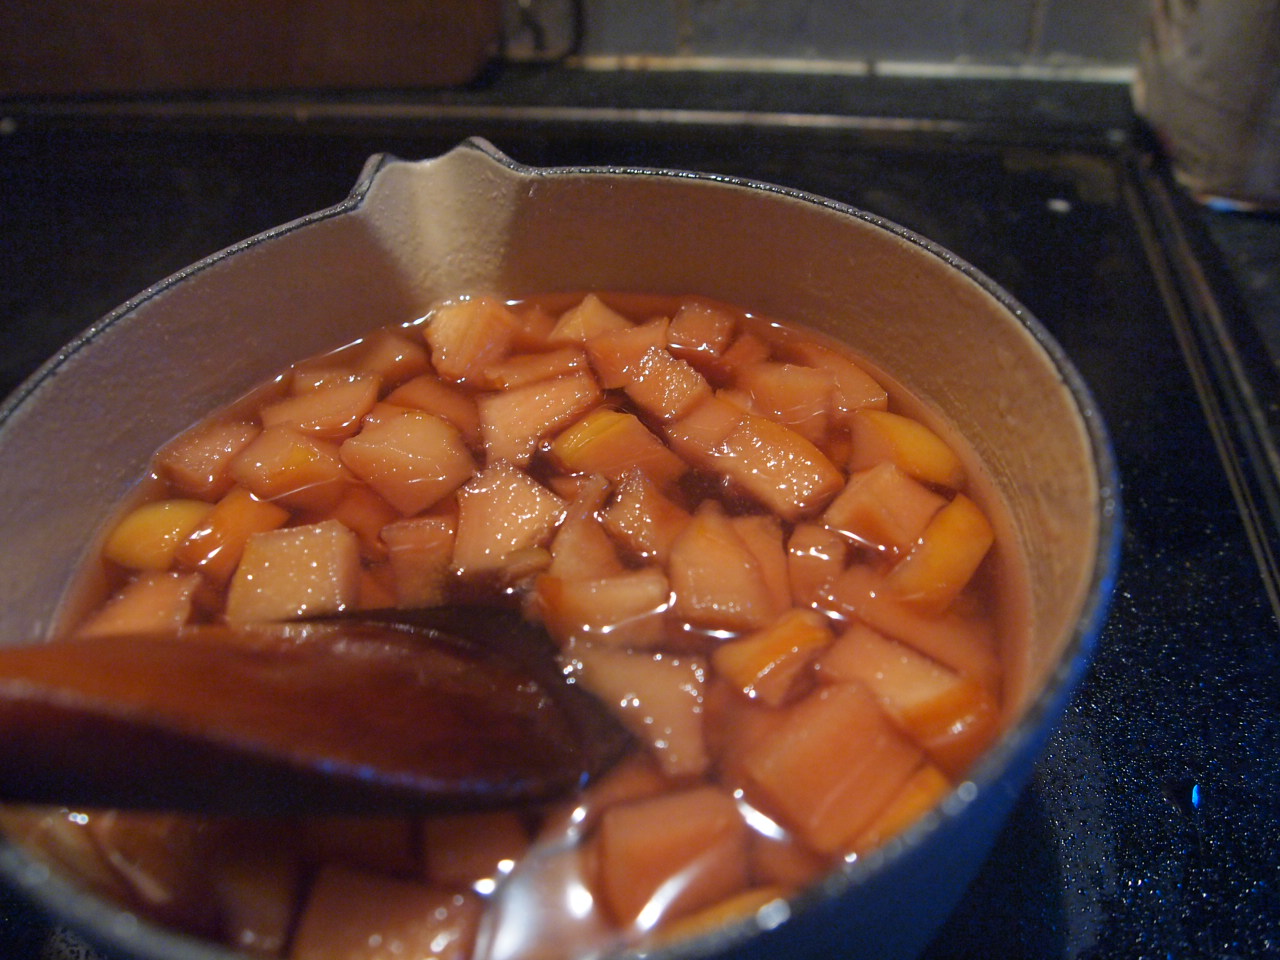
It does take a while to get the quinces candied to the right consistency, but it's not like you have to stand over them the whole time. Pop them on the hob and then go off and do what needs doing, but do remember to check on them every 10-15 minutes to see how they're going. *This is important, as I left my first batch for too long and they ended up burnt.* Once candied, they keep for up to a week, so you can always make them ahead of time too. 

The original recipe states that it only takes about 45 minutes to get them done, but I found that it took me about two hours to get them to the right consistency. I cooked mine low and slow to prevent the sugar from burning. 

Candied Quinces (from LA Times

Ingredients
1 1/2 cups water
1 1/2 cups granulated sugar
1 large quince
Directions
- Peel quince, slice in half and remove the core. Slice and cube the fruit into pieces roughly one inch wide and a quarter inch thick. 

- Combine water and sugar in a heavy-bottomed saucepan, and cook on medium heat until sugar dissolves. 
- Add cubed quince and reduce the heat to a gentle simmer, and cook until fruit is semi-translucent (the quince and syrup will turn a vivid shade of pinkish-red). 
Remove from  heat and pour into a heat-proof container. Cool, then store the fruit in the cooking syrup in an airtight container in the refrigerator. You'll have about 1 cup (8 ounces) of fruit.

Friday, 9 September 2011

Triple C - Chocolate and Coffee Cake with Chestnut Buttercream

This cake came about mainly because I really, really wanted to try making a Swiss meringue buttercream. And no, I couldn't just make the buttercream, because eating buttercream on its own would just be sinful, wouldn't it? Whereas eating buttercream and chocolate cake together is totally acceptable. Yup.
Chocolate and Coffee Cake (adapted from BBC Good Food: All-In-One Chocolate Cake)

Ingredients
175gm selfraising flour
3 tbsp 70% cocoa powder
175gm unsalted butter, softened
175gm golden caster sugar
1 tsp baking powder
3 eggs
1-2 tbsp milk
1 tbsp coffee flavouring (similar to this)

Directions
- Preheat the oven to 180C. Butter and baseline two 5-inch sandwich tins. Remove 3 tbsp of flour from the full amount ( the cocoa powder will make up the difference).

- Put all cake ingredients (except milk) into a large bowl and beat until creamy. Add the milk if mixture is too stiff - it should fall easily from a spoon.

- Divide the mixture evenly between the prepared tins, and level the surfaces of the mixtures. Bake on the same shelf in the oven for 20-25 minutes or until sponge springs back when pressed. Cool for 5 minutes, then turn the sponges out onto a wire rack to cool completely (peel greaseproof paper off if attached to cake).

- Level the sponges if necessary, by slicing off the tops.
Swiss Meringue Buttercream with Chestnut Puree (adapted from Life Is Great)

Ingredients
340gm butter, cubed, room temperature
5 large egg whites
220gm granulated sugar
2 tbsp pure vanilla extract
1/3 cup chestnut puree
pinch of salt


Directions
- Combine egg whites, sugar and salt in a clean*, heatproof bowl over a pan of simmering water. Whisk constantly over the heat, until mixture reaches about 70C and sugar has dissolved** (rub some mixture between fingers - if it feels grainy, then it hasn't dissolved).

- Take mixture off heat and beat with an electric whisk (or better yet, one of these bad boys if you're lucky enough to have one) on medium-high for about 8 minutes, until stiff peaks have formed and mixture has cooled to room temperature.

- Lower speed to medium and start adding a couple of small cubes of butter, making sure it has incorporated before adding more. Once all the butter is added, add in vanilla extract and chestnut puree, and beat until just combined***.

- Sandwich buttercream in between both layers of sponge, and over the sides and top of cake (I'm sure you can make it much prettier than mine - my spatula skills are non-existent. I also found that fish knives make nifty little 'spatulas' for tight spaces.)
(N.B. - this gives enough buttercream for 2 cakes. Leftovers can be refrigerated or frozen until needed. Just before using, defrost and bring to room temperature, and whip to a smooth consistency before using.)

* Clean your bowl and utensils with vodka beforehand to ensure there is no residual grease left. 

** I haven't got a sugar thermometer, so tested it with my fingers. Go ahead and dip your fingers in, and feel for a fairly hot and smooth texture. 

***You may find the mixture looks curdled after adding in butter - DO NOT PANIC! Keep beating it and it will smooth out fairly soon. 

Sunday, 14 August 2011

Fish Stew

Fish stew might be a bit of a misnomer, as this dish doesn't require the hours of cooking and er...stewing, that a traditional stew needs. It's more of a fish soup, prepared in little under an hour. The soup is enriched with some harissa paste and topped off with grated Parmesan for a spicy, thick texture. Sometimes you just crave a good helping of those piscine pals. 

Fish Stew (serves 4, or 2 very hungry people)

Ingredients
1 fennel
1 onion
2 medium tomatoes
1 tin of tomatoes (about 400gm)
6 cloves of garlic (more or less if preferred)
2 leeks
About 500gm of fish* (I used swordfish, tilapia, and cod)
half a bottle white wine
2 teaspoons chilli/ harissa paste
2 or 3 tablespoons grated Parmesan (or similar cheese)
parsley and basil, to garnish
Directions

- Cut your fish up into cubes and season them with salt and pepper. Set them aside for later. 

- Add some butter and olive oil to a pot on medium heat. Dice up your onion and garlic, and cook until soft and translucent. Slice up your fennel and leeks, and add that to the pot.

- Pour your white wine** into the pot - you can add more or less, depending on preferences. Dice and add the fresh and tinned tomatoes, then put a lid over the pot and let it stew about about half an hour. You can also add some fish sauce or salt to taste. 

- Check on your mixture about about 20-30 minutes. You should have a thick, red stew bubbling away now. Stir in your chilli/ harissa paste, place the fish on the top and cover it up with a lid. 

- Remove the lid after 10 minutes. The fish should be cooked through by now. Take the stew off the heat and ladle into bowls. Top with some grated Parmesan and garnish with basil and parsley. Serve with good, crusty bread!

* Shellfish such as prawns, and mussels, and even squid or octopus would work wonderfully in this dish.

**You can also use stock or even water in place of white wine.

You may have noticed some mushrooms in the photos here - I did use them last night because we had some we needed to finish up, but I wouldn't generally recommend them when making this soup as I don't think they add anything to it. 

Thursday, 9 June 2011

Quick and Easy Pear Tart

So, you really, really feel like dessert, but you just don't have to energy to head to the shops, and the thought of baking something is more than enough to drive you under the duvet. I was feeling that way a couple of nights ago, when this pear tart came to the rescue!

This tart takes hardly any time and effort to throw together, doesn't require any fancy ingredients, and is endlessly customisable, so you can always whip up a few if you've got unexpected guests coming over, or a last minute invite to...well, any occasion where you're likely to want stuff your face.
Easy Pear Tart (serves 4)

Ingredients 
3-4 medium pears
about 2 tbsp brown sugar
2 tsp ground cinnamon
1 tsp ground ginger
a knob of butter

Directions

- Defrost puff pastry sheet (if frozen). Preheat oven to 220C.

- Place puff pastry sheet onto a greased or lined baking try. Quarter, core and thinly slice pears; you can skin them if you prefer. 

- Arrange pear slices on the puff pastry sheet, leaving about 1cm empty on all sides so the pastry can puff up and form 'walls'. Sprinkle cinnamon, ginger and brown sugar all over the pear slices, then cut up little chunks of butter and dot them around the pears. 

- Place prepared tart in the oven and bake for about 15-20 minutes, until the pastry is golden brown and puffed up on the sides, and the pears are soft and browned. Let it cool down slightly, then enjoy it!

Friday, 3 June 2011

Epic Potato Salad

Po-tay-toe...Po-tah-toe...I love them! Mashed, roasted, fried, boiled, or, in this case, saladified (yes, that is the proper technical term for putting potatoes in a salad). This epic potato salad is solid enough to stand on it's own as a meal - we had it for dinner last night, with no accompaniments. It can also be made the night before, and served chilled at a summer picnic. 

It's the little chunks of bacon and chorizo in this that makes it so addictive. The little bits of meat are rendered until they get nice and crispy (even a little burnt), and then both meat and fat are added to the salad, for a subtly smoky, meat texture. I've made this salad a few times, with a few changes along the way, and since I'm sure you know how to make a potato salad anyway, this isn't so much a recipe, as a List of Stuff I Like In My Potato Salad.

List Of Stuff I Like In My Potato Salad
- bacon (lardons preferred)
- chorizo
- new baby potatoes
- sweet potatoes
- beetroot
- hardboiled eggs
- chives
- mayonnaise

The quantities are a matter of preference, and it's sooo easy to throw together that you're likely to find yourself making it all summer long.

Wednesday, 27 April 2011

Good Friday Brownies

How do you transform Good Friday into Awesome Friday? With a picnic in the park, sustained by lots of homemade brownies, of course. These brownies combine those two Easter essentials, eggs and chocolate, and can be customised with other goodies such as nuts or cherries, or simply left plain.


Good Friday (or any other day) Brownies

Ingredients
250gm butter 
200gm dark chocolate, chopped into small pieces
200gm caster sugar
100gm cocoa powder
75gm plain flour
1 tsp baking powder
4 eggs
about 150gm nuts/cherries (optional)

Directions

- Preheat oven to 180C. 

- Place a heatproof bowl over a pan of boiling water, add butter and chocolate to the bowl and stir gently until melted. Take bowl off heat, add cherries/nuts, if using.

- In a separate bowl, combine cocoa powder, flour, baking powder and sugar. Add the dry mixture into the bowl of chocolate and butter. 

- Lightly whisk the eggs, then combine with the rest of the batter. Gently stir everything together until you get a smooth, silky consistency.

- Pour batter into a square baking tray and bake for about 25-30 mins.


Thursday, 21 April 2011

Flourless Strawberry Cake

'Be prepared...' - it pays to keep that old Boy Scout motto in mind when planning your bakes, especially when it comes to your own birthday cake. Having come across a huge punnet of strawberries for the ridiculously reduced price of only 59p while at the supermarket, I was all hyped up to bake myself a wonderfully pink strawberry cake. It would be a strawberry and semolina cake, I decided on the way home - I thought I had half a bag of semolina at the back of the cupboard, and of course, didn't bother to check again.
I'm sure you can guess how the rest of this story goes...I opened the cupboard to reach for the bag of semolina, only to find I had...nothing. Undeterred, I decided to use the flourless orange cake recipe and substitute strawberries for the oranges. Of course, that wasn't the end of the saga - I discovered that I only had 5 eggs and 175 grams of ground almonds (the original recipe calls for 6 eggs and 200 grams of ground almonds). If you're thinking 'Why didn't you just go to the shop to get more?' then you probably haven't been reading this blog for long. I'm lazy, and it was dark, and I was tired, and hungry, and...and...
The resulting cake was very moist indeed, but it wasn't a complete failure. In fact, the texture was fairly similar to that of a nonbaked cheesecake. I can't wait for summer to come around again so I can have tons of juicy strawberries on hand to try this recipe again.

Flourless Strawberry Cake


Ingredients 
400gm strawberries, roughly crushed
5 eggs, separated
175gm caster sugar
175gm ground almonds
1 tbsp baking powder

Directions

- Preheat oven to 180 C and lightly grease/line a 9 inch springform tin. 

- Beat egg yolks and sugar together until pale, then beat in strawberries, almonds and baking powder.

- Beat egg whites until soft peaks, then fold gently into mixture. Pour batter into baking tin, and bake for an hour until firm to the touch. 

- Cool the cake in the tin, then remove it and dust icing sugar over it before serving. Enjoy!

Friday, 1 April 2011

Zesty Orange Crisps

Spring's arrival has brought with it a craving for orange. It could be because of the longer, brighter days, or it could my body telling me I need more vitamins - I'm hardly ever in the sun enjoying the longer, brighter days, after all (and my pasty, glow-in-the-dark legs are testament to that.)

Whatever the reason, I'm hardly one to say no to desserts, especially fruity ones. What to make this time, though? I'm not really a fan of orange-flavoured chocolates (sorry, Terry's) - I find them a little too cloying - and I just made an orange cake not too long ago. Well, how about biscuits then? A quick and impatient Google search didn't throw up many recipes that grabbed me, so I thought I'd indulge in an experiment instead. 

Orange Crisps

Ingredients
(makes about 40 biscuits)

150gm caster sugar
150gm butter, softened
225gm plain flour
1 tbsp vanilla extract
grated rind of 1 orange
2 tbsps orange juice

Directions
- Cream sugar and butter until fluffy. Add in vanilla extract, orange zest and juice.

- Stir in flour, knead mixture lightly, roll into a 2 inch wide sausage shape, wrap it in greaseproof paper or clingfilm and freeze for at least 30 minutes.

- Preheat oven to 175 C, and take the biscuit mixture out of the freezer. Slice off fairly thin pieces (I made mine about 3mm thick) and place them on a greased baking tray. Leave some space inbetween, as they will spread a little while in the oven.

- Bake for about 6-8 minutes, until lightly golden and remove from oven to cool.

At this stage, you can eat them as they are, or make a glaze to drizzle over them. I only made a glaze for them because I wanted to pretty up some burnt ones, so it's not strictly necessary, but it does help finish up the rest of the juice from your zested and squeezed orange.

Glaze
50gm icing sugar
2tbsp orange juice

Directions
- Mix icing sugar and orange juice until you get a runny consistency, then drizzle the mixture over the biscuits with a fork. Leave to set, then enjoy!

They can be stored in an airtight box for up to a week (if you can resist them for that long!).