Showing posts with label tutorials (kinda). Show all posts

Saturday, 24 December 2011

Cooking For Christmas - Candied Quinces

Regular visitors to this blog will probably be aware of my love of quinces by now. I strive to use them in a couple of recipes whenever they come into season, so I knew what I was going to do with them as soon as I read through this panforte recipe.

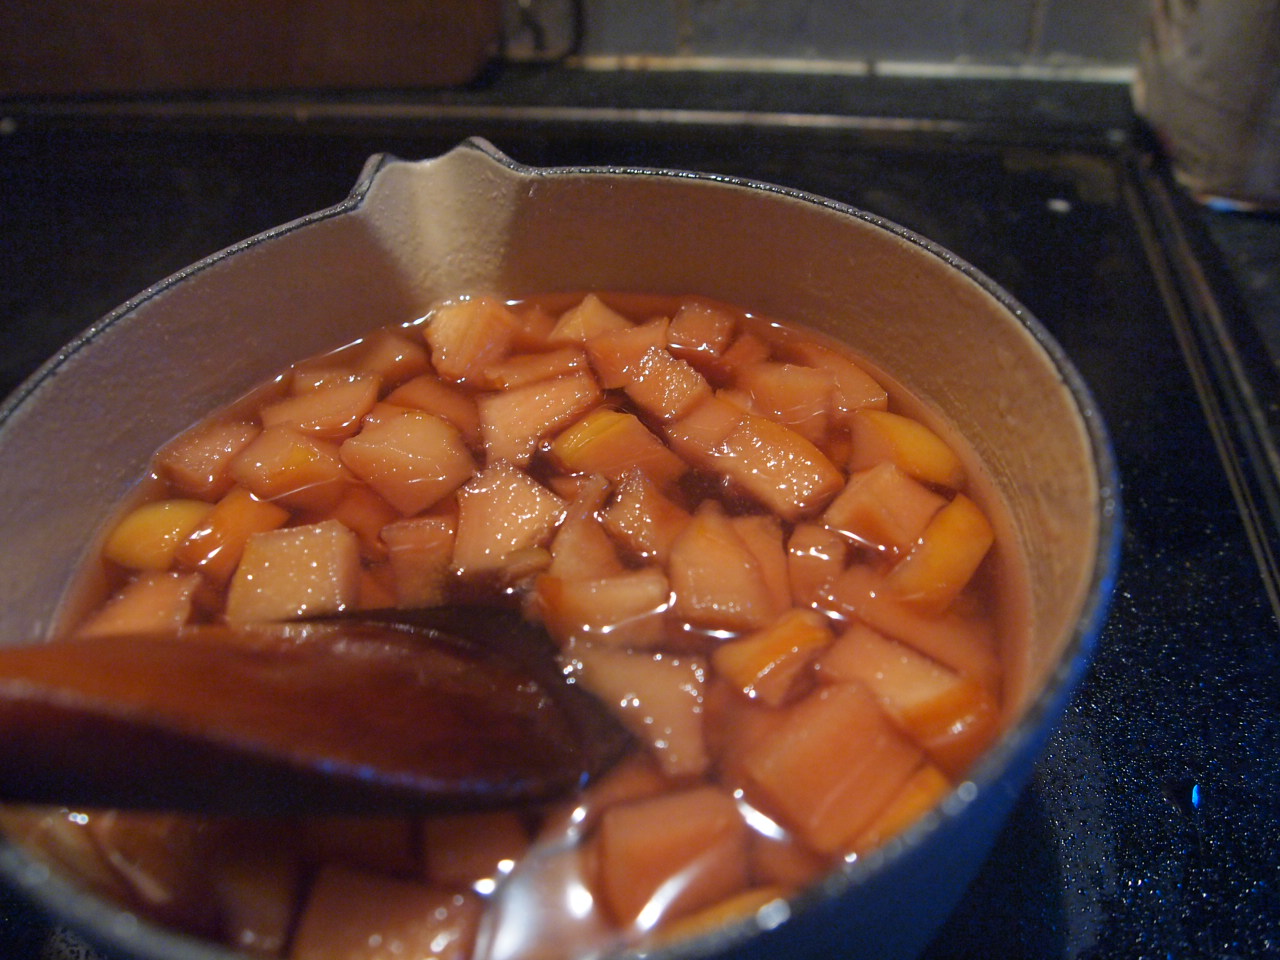
It does take a while to get the quinces candied to the right consistency, but it's not like you have to stand over them the whole time. Pop them on the hob and then go off and do what needs doing, but do remember to check on them every 10-15 minutes to see how they're going. *This is important, as I left my first batch for too long and they ended up burnt.* Once candied, they keep for up to a week, so you can always make them ahead of time too. 

The original recipe states that it only takes about 45 minutes to get them done, but I found that it took me about two hours to get them to the right consistency. I cooked mine low and slow to prevent the sugar from burning. 

Candied Quinces (from LA Times

Ingredients
1 1/2 cups water
1 1/2 cups granulated sugar
1 large quince
Directions
- Peel quince, slice in half and remove the core. Slice and cube the fruit into pieces roughly one inch wide and a quarter inch thick. 

- Combine water and sugar in a heavy-bottomed saucepan, and cook on medium heat until sugar dissolves. 
- Add cubed quince and reduce the heat to a gentle simmer, and cook until fruit is semi-translucent (the quince and syrup will turn a vivid shade of pinkish-red). 
Remove from  heat and pour into a heat-proof container. Cool, then store the fruit in the cooking syrup in an airtight container in the refrigerator. You'll have about 1 cup (8 ounces) of fruit.

Thursday, 25 August 2011

Fly Front!

Here's a sneak peek at a new project. What's so special about it? It's my first ever fly front zipper! I've been thinking about learning how to insert a fly front zipper for ages, and kept putting it off because it all looked impossibly complicated and potentially heartbreaking. Thank goodness for 50p pillowcases from the op-shop eh? 

I finally took the plunge last week, after several hours of Googling and Youtubing, and you know what? It definitely wasn't as complicated as it looked! Now all I want to do is make up shorts and trousers so I can keep inserting fancy fly front zippers in them. For those of you who are thinking of doing the same, I highly recommend this video on Threads. You'll be a fly fronting pro in no time, I promise! 

Tuesday, 2 November 2010

Bleeding Ghoulies

While the cool kids were out trick-or-treating this past Saturday night, I was holed up in my kitchen, cackling in glee as I knelt in front of the oven. The reason? I was waiting for my little ghosties and jack-o'-lantern cakes to come out so I could devour them. (But the real reason is that I'm way too uncool to be invited to any Halloween parties, and I suffer from acute social phobia.)
These little cakes are an homage to the Satan cakes Googy and I used to bake while we lived in the Pony Club - so named because they were devilishly delish. They're gooey chocolate cakes with a spoonful of Nutella hidden in the middle, and a far cry from the sickly, vapid fairy cakes supermarkets tend to offer. 
I've been sworn unto death not to reveal the secret of Satan cakes, though, and these ghoulish cakes were the result of me throwing some ingredients together, so I haven't got a recipe for you. What this post is, instead, is a kind of 'how-to assemble your own bleeding ghostie cake'. 

The silicon ghost and jack-'o-lantern moulds came from Sainsburys, but it's not a big deal if you can't find them. You can always bake them as regular cupcakes, then draw scary faces on afterwards.

You'll need:
Ghost/ Jack-o'-lantern silicon moulds (if you can find them)
or
Cupcake liners
Your favourite chocolate cake recipe
Your favourite red jam (I used a raspberry conserve)
100gm white chocolate
50ml milk (I used vanilla-flavoured soy milk*)
1. Preheat your oven if needed, and grease the silicon moulds. Make up the chocolate cake batter.

2. Drop a couple of tablespoons of cake batter into each mould, then add a teaspoon (or 2) of jam on top. Add more cake batter until each mould is about 3/4 full.

3. Bake for time required. Remove cakes from moulds and let them cool.

4. Once cool, start preparing the white chocolate ganache for the top. Finely chop up the white chocolate, place it into a heatproof bowl and heat up the milk. Pour the milk over the white chocolate and stir until you get a smooth, homogeneous mixture. Pour or drizzle the mixture over each cake, leaving a thin layer of ganache on top. 

5. Try and wait til the chocolate cools before eating. Watch as they magically disappear into your tummy! Spooky!

*The combination of white chocolate and vanilla-flavoured soy milk makes the ganache taste like condensed milk. I'm a fan. 

Thursday, 21 October 2010

Candied Pomelo Peel

The Manbeast and I have been a little pomelo-crazy lately, ending most of our meals by devouring at least a segment of this dino-sized grapefruit-ancestor. While the giant, juicy sacs were perfect for quenching an after-dinner thirst, the rind and pith, with the texture (and probably, taste) of building insulation, had to be binned. I didn't feel so good about chucking all that away though - surely, but surely, something could be done with it? 

A little digging around on Google, and I unearthed several recipes for making candied pomelo peel. I love candied ginger, so the idea of candying some pomelo peel sounded good to me. Here's the recipe I ended up using - Patricia Yeo's Candied Pomelo Peel. I've taken step-by-step photos too, for those of you who are interesting in trying it out. 
1. Fill a pot with water (I found it much easier using a large pot),  then bring it to a boil. Add the peel to the pot, and, after bringing the water back to a boil, let it boil for about 10-15 minutes. D
Drain the peel, discard the water and repeat this step another two times. This helps removes some of the bitterness, and makes the peel easier to remove.
You'll find that the pith has turned translucent after the first boiling. You can remove it then, or wait till after the third boiling.
2. Drain the peel, and try and scrap off as much of the pith as possible, leaving only the green parts. Cut the peel into thin strips (about 1/4 inch thick). Sorry, no pictures of this step, it's a two-handed job.

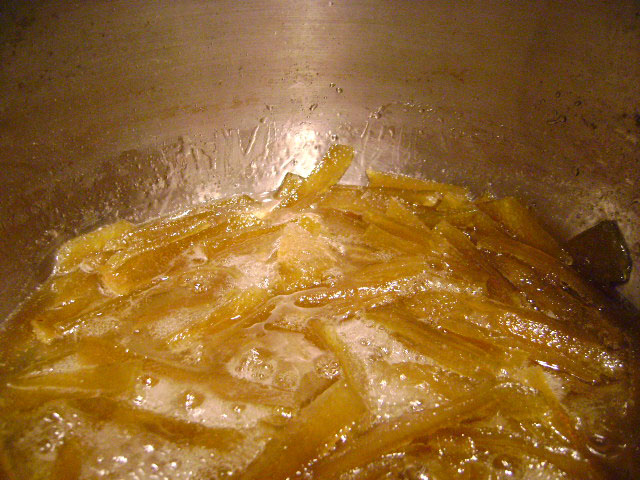
3. Add 500 ml water and 500 gm sugar to a pot. Dissolve the sugar in the water, bring the syrup to a boil, then add the peel and cook over a low heat for about one hour, until most of the liquid is gone. 
You can see in this photo how the peel has changed in colour, it looks translucent here. 
4. Okay, this bit takes a bit of coordination and concentration, you don't want to be burnt by hot sugar so be careful! Add about 200gm granulated sugar into a bowl or plate. Place a wire rack over a baking tray (to catch any drips), then remove a few strips of peel at a time and drop them into the sugar. Coat the strips of peel in the sugar, the place them on the rack to dry. Repeat until all the peel is used up, you may have to add more granulated sugar every now and then. 

I used a pair of tongs to pick up the strips, but then found it much easier using a pair of chopsticks instead. Try and persuade someone to help you here, so you can pick up the strips and drop them into the sugar, and the other person can do the coating and drying.
Let it dry overnight, then keep it in an airtight container, or put them into little cellophane bags and give them to friends. 

The candied peel have a slightly bitter aftertaste, which I really enjoy, but not everyone might like. I asked the Manbacon to test them out on his colleagues, and they all hated it because they found it too bitter for them. 

Sunday, 28 February 2010

Recycled Padded Envelopes - A Tutorial

If you're like me and do a fair bit of wheelin' and dealin' on the interwebs, you probably end up with lots of used, padded envelopes piled up precariously too. The little recycled padded envelopes shown here can be made in various sizes, don't take much time to whip up, and won't cost you any money at all!

You'll need:
Large padded envelopes
Scissors (DO NOT use your best fabric scissors!)
Glue (I used Copydex, nut you can use any kind of paper glue) 
Scrap paper (Magazines, catalogues, wallpaper, newspaper etc)
Sewing machine
Thread
Sewing needle (if you haven't got a sewing machine)

Here we go!
1) You'll need to transform this huge padded envelope (above) into this (picture below). Start by splitting the front and back of the envelope apart, so you get 2 pieces of padded goodness. Then, fold the separated parts into halves or quarters, depending on the size you want to end up with, and cut them up into into 2 or 4 parts. Those will be the front and back bits of your new and improved, little padded envelopes. Trim the bit that you'll use as the back so it's about an inch shorter than the front - this way, the longer portion forms a flap that you can simply fold over and tape when you need to post something.

2) Still with me? Ok, good. Now, get the scrap paper that you want to use on your envelopes, and trim them so they're just slightly larger than the padded pieces. This makes it easier to glue them on. Put glue on the front of the padded pieces (the side with the paper, not the bubble-wrap).You don't need to glue the whole piece, just a dab on all for sides will do, then stick them onto the back of the scrap paper. Trim the overlapping paper bits away, so the edges are all flush. 

Do the same for all your padded pieces.

3) Let the glued pieces dry (overnight is best, but at least 4 hours if you're in a hurry). This is so the glue doesn't make your sewing needle all sticky.

Time to sew. Set your machine to a zig-zag stitch (if you haven't got one on your machine, just go over it a few times). 
Place the front and back envelope pieces together, wrong sides (i.e bubble-wrap sides) facing each other. Turn it around so the shorter, back side faces you, and start sewing. You'll only need to sew around three sides, leaving the top open so you can slip your goodies in later. Backstitch a couple of times at the beginning and end, and at the corners of the envelope, to make it more secure.

4) Cut the hanging bits of thread off, and voila, you're done! Congratulations, young grasshopper, you've made a fancy little recycled envelope! Now go make more...

Tips and suggestions and other stuff - I made my envelopes fairly small (about 6 x 7 inches) but you can, of course, make yours any size you like/need. If you need a huge envelope, you can always just glue some scrap paper or newspaper all over it, and re-use it. 

I used some pages from a Toast catalogue for the example above, and some pages from a travel catalogue for the others. You can use any kind of paper you have laying around - newspapers, wallpaper, wrapping paper, whatever. If you're going to pop these into the post, it may be a good idea to leave the front fairly plain, and make the back a little fancier, so it's not too distracting for the postie. 

If you haven't got access to a sewing machine, or you're simply not up for abusing your machine like I do, you can always sew the sides up using a needle and thread. I think a nice blanket stitch would make it fairly secure, and you can use some yarn or embroidery floss for something a little fancier. It takes a little more time, but at least your sewing machine won't be making any angry noises.

Saturday, 12 December 2009

Christmas Tree

These were finished a couple of weeks ago, but I wanted to make sure the people they were intended for received them before I posted pictures.

The Christmas tree 'bracelet' is actually a wearable pincushion, for sewing on the go. Or just to wear if you want to feel like a Christmas superhero. I made two of these - one for my Mumsie and another for the Mancreature's Mama. They're very simple to make, and you should be able to whip one up in about half an hour, if you need some emergency stocking fillers or gifts. By the way, I'm sorry there aren't more 'process' photos, I didn't really think about making a tutorial until I'd finished them, then I was too hungry to make another one, with photos. Please don't give me lumps of coal for Christmas.

You'll need -
felt (in the colour of your choice)
embroidery thread (I used a matching green for the blanket stitch around the outside, and two strands of red and yellow for the stars)
stuffing (Polyfill, cotton wool, yarn or fabric scraps)
5 inches of elastic
scrap of fabric, about 8 x 4 inches (optional, you can choose to use pretty ribbon or lace and make the pincushion tie around the wrist instead) to enclose the elastic
paper stencil, in the shape of a tree (or any other shape you feel like making, I guess)


- Use the stencil to trace the shape onto the felt, then cut out two pieces, one each for the front and back. To make sure that both pieces are the same size, pin them together before cutting.

- Embroider some 'stars' on the front piece of felt. You can use a washable or disappearing ink pen (like this) to map out where you want the stars to be, but I just placed them randomly. I used cross-stitch for them, first in red thread, then going over those with the yellow thread.

*You can skip the next two steps if you're using ribbon or lace.
- Sew the long sides of your fabric (to cover the elastic) together, making a long tube, then turn it inside out so the stitching and seams are hidden. Put the elastic into the tube (I find it easiest to use a safety pin to guide the elastic through the tube). Pinch both of the elastic and sew them together, making a circular band.

- Ok, this is the part where I just jammed everything together, so...erm...
Sew the ends of the fabric tube together somehow, so you get a stretchy, fabric-covered 'bracelet'. Sew this bit to the back portion of the felt tree shape.

- If you're using ribbon or lace, sew it to the back of the felt tree shape as well, but you won't have to go through all that hassle with the elastic and all. You can leave the ends open so the recipient can tie it to fit their wrist. I should have thought of this when I was making my trees!

- Using the green thread, start blanket stitching around the top third portion of the tree, then stuff Polyfill (or whatever you're using) into the portion that's already stitched. Keep adding blanket stitches and stuffing alternately, until all the stuffing is inside. Knot the thread neatly and securely, then cut of the ends, and you're done! Wearable pincushion tree!

I also crocheted some heart shapes from thin metal wire to send to my family, so they could hang it on their tree. Although my sister tells me that they may not be having a tree this year, so I guess these ornaments won't be going up...

I don't actually have a tutorial for these, as the pattern isn't mine. I got the pattern for the hearts from here - I found her crochet hearts a lot prettier compared to most others (which are mainly made of of rows of single crochet - boring!).

All I did was string some beads onto thin copper wire, then crochet the hearts, and add a bit of yarn to the top for hanging. They didn't take too long to make either, although I found working with the wire very fiddly. You can always make it in nice yarn if you want to be kind to your fingers.


Wednesday, 4 November 2009

No Bake Pumpkin Cheesecake-Soup


Or, squeeze your pumpkins!

The last of my pumpkin dishes from Saturday - and the whole raison d'etre for even getting a humongo pumpkin in the first place - was a pumpkin cheesecake. Which sort of became a pumpkin-flavoured cream cheese soup But it was still tasty anyway (thanks to the addition of a WHOLE tin of condensed milk) which is really all that counts.

I may have mentioned earlier this week that I'd steamed the pumpkin for about half an hour, to ensure the flesh got soft enough for mashing. The problem with steaming, though, is that the pumpkin flesh gets a little too watery. And since I was soooooo eager for cheesecake (piggy!) I didn't bother trying to spend ages squeezing all the liquid out of the streamed pumpkin - which resulted in a sloppy yellow-tinged mush that never set. We're eating it with a spoon anyway, it's still yummy.

Anyway, if you're interested, here's the incredibly easy recipe for no-bake pumpkin cheesecake.

Ingredients
Base:
1/2 pack of plain HobNobs (or similar digestive biscuits)
1/2 pack of dark chocolate Hobnobs (or similar)
100gms of butter

Filling
600gms cream cheese
1/2 large pumpkin (steamed, mashed and DRAINED)
400gms sweetened condensed milk

Crush the plain HobNobs into fine crumbs (you may find it easier to do this with a food processor, but I just used my hands. My strong, powerful hands.) You can leave the dark chocolate HobNobs as bigger, rougher crumbs so you get more chocolatey bits to bite into. Place the biscuit crumbs into a springform cake tin.

Melt the butter and mix it through the biscuit crumbs to bind them together. Use more butter if the crumbs don't stick together properly. Now's not the time to be worrying about your expanding waistline. Use the bottom of a spoon to press the mixture down into the tin.

Mix the cream cheese, pumpkin mash and condensed milk together (either with a spoon, or a food processor). Pour the deliciousness into the springform tin, on top of the biscuit mixture. Pop into the fridge and let it set for at least 3 hours, preferably overnight.


Enjoy!

Tuesday, 3 November 2009

Chewy Pumpkin Biscuits


The humongous pumpkin I purchased on Saturday was more than enough for the cheesecake I'd planned on making. So, after cutting up and steaming the pumpkin, I separated the cooked, yellowy-orange flesh into two portions - one for the cheesecake, and one for something else. I wondered about freezing steamed pumpkin for later, but my sweet tooth overruled me and I decided on pumpkin biscuits!

You're probably already aware that I'm a fan of the fast and furious, throw-everything-together-and-stir method of baking. So, I came up with a lazy easy recipe for chewy pumpkin biscuits while roasting the pumpkin seeds. The amount of ingredients are fairly approximate, as usual.

Ingredients:
1/3 large pumpkin (steamed, then mashed)
150gm butter
300gm caster sugar
150gm plain flour
150gm self-raising flour
cinnamon (to taste)
nutmeg (to taste)

Preheat oven to 200 degrees Celsius.

Cream butter and sugar together.

Add both kinds of flour to butter/sugar mixture, and as much (or as little) of the cinnamon and nutmeg as you like. Give it a slight stir to make sure the spices are fairly evenly distributed throughout.

If your steamed pumpkin flesh is quite watery (as mine was), then try to drain as much of the liquid out as possible, otherwise, your batter may end up far too liquidy. When that's done, add the pumpkin to the dry mixture, and stir everything together.

Once all the parts are mixed together (like brown mush), grab your baking tray (either greased or with baking paper on it) and drop dollops of the batter on it. Use a tablespoon to help you.

Pop it into the baking try and bake for 15-20 minutes, let them cool, then destroy them with your mouth! They're really good dunked into a nice mug of hot chocolate.

Monday, 2 November 2009

SOS (Save Our Seeds!)


While I didn't go to a Halloween party this year, I did try to acknowledge the day by buying a pumpkin. The idea was to make a pumpkin cheesecake (more on that later) but after butchering the pumpkin so I could steam its flesh, I also ended up with quite a few pumpkin seeds. And since I'm loathe to let things go to waste, I decided to roast the seeds instead of chucking them. It's really simple to do, and the seeds make a tasty beer snack.

Once you've scooped all the seeds out of the pumpkin, try and get rid of as much of the stringy pulp as you can. I did this by placing the seeds into a bowl full of water, and picking out the pulp by hand. It doesn't take much time. After you've cleaned the seeds up, place them on a tray or plate to dry for at least half an hour.

When the seeds are fairly dry, start preheating the oven on a low heat - I set mine to 120 degrees Celsius. Place the pumpkin seeds on a baking tray covered with baking paper. Melt a knob of unsalted butter and  pour it over the seeds, coating them evenly. (And if you're microwaving the butter to melt it, please make sure you keep an eye on it or cover it with sometime, or else it explodes all over your microwave and you end up having to clean the greasy bits up. I got my poppet to help me with melting the butter, so he wouldn't feel left out, and that's exactly what happened. Thrice. Because he never learns from his mistakes.)

Add about a tablespoon of salt and a tablespoon of dried garlic flakes to the buttery seeds, then pop them into the oven to roast for about 30 minutes. Keep an eye on them so they don't get burnt, and remove them when they get golden-brown. Once they get cool enough to handle, they're ready to be eaten!

Although I used salt and garlic (you can use fresh minced garlic too, by the way, I just didn't have any), you can adapt the recipe to make a sweet version too. Just be sure to use unsalted butter, and substitute the savoury flavourings for something sweet, like cinnamon and some honey, maybe?

I also made some pumpkin biscuits and a pumpkin cheesecake that night, so check back here soon for the other recipes!

Wednesday, 15 July 2009

Tutorial - Security Pattern Scrap Paper Notebook

When I wrote about the security-patterned paper notebook I made, I also said that I would have a tutorial up 'in a couple of weeks'. And that was only, oh, I dunno, about a month and a half ago.

But I've finally got my arse into gear and taken some photos of the steps required, so you can make your own little notebooks out of scrap paper too! Of course, you can make them any size you like, I make mine A6 as they fit into pockets easily. You don't really need any bookbinding equipment, but it probably makes things much easier if you do. I don't.


1) Gather your scrap paper, and cut them into size if they're not the size you want. I use a range of papers from magazine pages and envelopes. You'll also need a piece of cardboard - cut into the same size as the paper you're using - for the cover. For this tute, I'll be using an old postcard for the cover, but you can cut up old cereal boxes or other suitable items too.


2) You'll also need some tools - if you're professional, you'll have an awl (for punching holes), a bone folder (for scoring paper and cardboard), a metal ruler, upholstery thread and maybe an upholstery needle. Oh, and a Stanley knife.

If you're like me, you'll use a thick canvas needle (for punching holes), your fingers (for folding), crochet cotton and a darning needle. I do, however, have a metal ruler and a Stanley knife named Stanley! Wahey! I've actually got an excellent metal ruler that has an indentation running all the way down the middle so you can place your fingers in it and slice away without worrying about your fingers. I bought it coz I was seduced by its good looks, then realised that it was also cheaper than the standard flat ruler, so, double score!


3) Decide on the number of pages you want in your notebook. Remember: each piece of paper gives you 4 pages when folded in half. I wanted 32 A6 pages in my notebook, so I picked out 8 A5 pieces of paper and folded them all in half.

You'll get a nicer fold with a bone folder, but I don't have one, so...I used my fingers.


4) You'll then need to collate your folded pieces of paper. Just put them all together in the order you want them.


5) Fold your piece of cardboard/ postcard in half too. If you have a bone folder, score the cardboard down the middle before you fold it for a sharp, professional look. I'm jsut using my stubby little fingies.


6) This is where having an awl comes in handy. If you haven't got one, get hold of a thick needle. In my case, I'm using a thick canvas needle. Piece 3 holes in the spine of your notebook. Hold all the pages together, then make a hole in the middle of the spine, then one each nearer the edges. If you want to be neat, you can measure out where you want the holes to be and mark them with a pencil before piercing, but I just guess where I want them and poke. Just like life.


7) Do the same to your cover. The easiest way to get all the holes aligned is to put the pages into the cover, hold them all tight, and put your needle through the holes you've already pierced, then push it all the way through the cardboard cover.


8) Next thread your darning needle. Or a proper bookbinding-type needle if you have one. The professionals use waxed linen upholstery thread (I think?) but I'm using some nifty red crochet cotton instead. Coz it's what I have. Oh, and don't knot your thread at the end.


9) Then open your notebook to the centre page, and put your needle and thread through the middle hole, leaving a tail about 2 inches long. You'll need this tail later.


10) Put your needle back through the top hole...


11) ...and bring it back out through the bottom hole.


12) Then bring the needle back into the middle hole, and made a knot with the 2-inch tail that was left there. Trim the tails so you don't have too much of a bulge when you close the notebook.


13) We're almost there! You'll notice that the pages tend to stick out, so you can choose to leave them as they are, or trim them. At times, you'll be trimming mere slivers of paper, which can get fiddly, so you can always them like that and say you were going for the 'shabby chic' look.

14) Because this is a tute, I'm gonna to show you how to trim them. This is where a metal ruler and Mr. Stanley Knife come in handy. Make sure your blade is sharp too, or you'll end up with gross rumpled edges (shabby chic, again?). A metal ruler works much better than a plastic or wooden one in this case because the blade doesn't cut into the metal, so you'll be almost certain that you're cutting a straight line.

I say 'almost', because sometimes my fingers go crazy and don't listen to me and I end up with wavy cuts anyway.

So, place yourmetal ruler against the edge of the cover, and make light but firm cuts till you've trimmed all the protruding edges way. Don't rush this, as the blade might drag on the paper and tear bits off.


And it's done! I've put up some examples of different ones that I've made, so you get an idea of the kinds of covers you can use. Of course, you can use any type of paper inside, or make a little storybook out of it too.

Thursday, 21 May 2009

Powermetal Gauntlets


...are the secret name for the pair of armwarmers I just finished for Ari. Why? Because I was listening to these guys -


over and over again, while knitting the armwarmers/gauntlets. (I can't be sure, but it looks like the dude on the end has fake blood on his keytar?)


I think power metal may just be the most effective music for knitting...well, for me at least. It just makes me knit so much faster. I'm a knitting machine when Dragonforce are playing. Sweatshop owners should play them constantly to ensure higher productivity.

Oh, for those interesting in the actual knitting deets - the pattern is based on a wave stitch that I modified occasionally*.

Wave stitch goes like this: Cast on multiples of 12 plus 1
Row 1 - *k1, (k2tog) twice, (yfwd, k1) three times, yfwd, (slip 1, k1, psso) twice, rep from * to last stitch, k1

Row 2 - p

Row 3 - k

Row 4 - p

The way I did it on my armwarmers - start with an inch of 2x2 ribbing, and then *follow the whole pattern once through, then do four repeats of rows 1 and 2 alternately (cutting out rows 3 and 4 - the knit and purl rows), then do another repeat of all four rows after that.

Do that till you're at your desired length (I ended by doing 2 repeats of rows 1 -4) then cast on an extra 6 stitches and finished with an inch of garter stitch. The extra 6 stitches form a tab so you can add a button and close it.

If you like, you can do the whole thing on double-points or just omit the extra 6 stitches altogether. I did it because I like buttons. And dpns make me nervous so I knit it flat then seamed it to just under the garter stitch edge.

Oh, these ones are made to be fitted on the arm - I started with 3mm needles, did a third of the thing, then swapped to 4mm needles, did another third, then finished off the rest with 5mm needles. You can always make them on different sized needles for a bagger/tighter fit, or even just use one size of needles for the whole thing.

I might do another pair on dpns just to get over my fear of them. While listening to Dragonforce, of course. Or maybe even Manowar.

\m/